
VIPRE Ultimate gives you the award-winning antivirus protection of VIPRE Advanced Security bundled with Internet Shield VPN and Privacy Shield to provide extra layers of protection while you’re online.
What's Included
- VIPRE Advanced Security for Home - Windows, Mac
- VIPRE Privacy Shield - Windows
- Internet Shield VPN by VIPRE - Windows, Mac, iOS, Android
Features
VIPRE Ultimate provides security while online by:
- Keeping your browsing private
- Maintaining your online speed
- Blocking unauthorized access to your webcam and microphone
- Scanning the Dark Web for your sensitive data
- Providing firewall and email security
VIPRE Ultimate also secures your computer's data by:
- Reporting and removing sensitive data including:
- Personal Profiles
- Login credentials
- Locally stored documents
- Removing all digital traces from your computer
- Erasing files securely and completely
Select a topic below to get started:
VIPRE Advanced Security for Home - Windows
You're about to install the award-winning VIPRE Advanced Security antivirus on your computer, but before we begin, let's review what you'll need to ensure VIPRE will install properly on your computer.
What do I need to install VIPRE?
This section will explain the software and hardware requirements for installing VIPRE Advanced Security for Home - Windows.
Software Requirements
Download VIPRE Advanced Security for Home - Windows
Next, after downloading VIPRE, you'll need the 25-character product key that was provided to you when you completed your purchase. You should have received your product key via email, and the product will be a mix of letters and numbers in the following format: XXXXX-XXXXX-XXXXX-XXXXX-XXXXX.
Important
Hardware Requirements
The computer you want to install VIPRE on will need to meet a set of minimum requirements, like having Windows 10 or higher, at least 1 GB of RAM, and a minimum of 1 GB available storage on your hard drive. For complete details regarding system requirements, click here.
We also strongly recommend access to a high-speed Internet connection as well as uninstalling any Antivirus program you may already have on your computer.
Now that you have all the requirements to complete a successful installation, let's begin!
Installing VIPRE Advanced Security
- Navigate to where you have downloaded and saved the VIPRE file called vipre-advanced-security.exe and double-click to open it
- If you are prompted by Windows User Account Control asking if you want to allow VIPRE to make changes to your computer, click Yes
- VIPRE Setup will appear; enter your product key
- Ensure that you have read the End User License Agreement before clicking Agree and Continue
- If you do not want VIPRE to be installed in its default directory, select Change where VIPRE is installed at the bottom of VIPRE Setup
- Select Agree and Continue
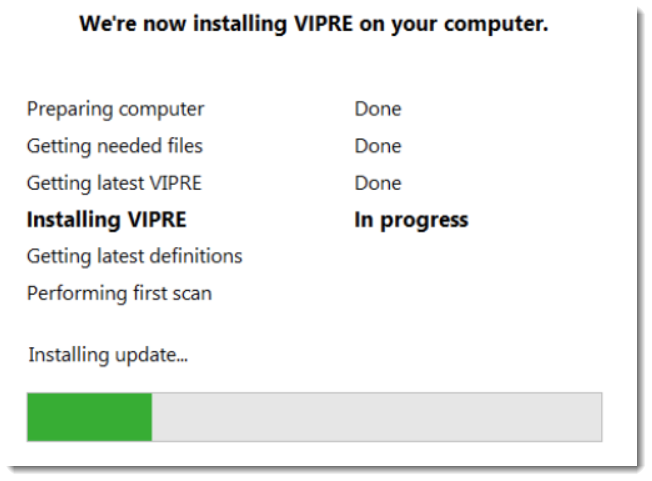
Now, at this point, VIPRE scans your computer for other antivirus programs you might still have installed. If VIPRE doesn't find any other antivirus programs, VIPRE will begin installing. If VIPRE does find another antivirus program, you will be prompted to uninstall it before VIPRE begins installing.
Once installation is complete, click Continue to VIPRE.
Congratulations! Installation is now complete.
Refer to our product guide for full details.
Internet Shield VPN by VIPRE
Internet Shield VPN by VIPRE is compatible with Android, Apple iOS, Mac, and Windows operating systems. This article provides installation steps for each of the compatible operating systems.
Creating an Account
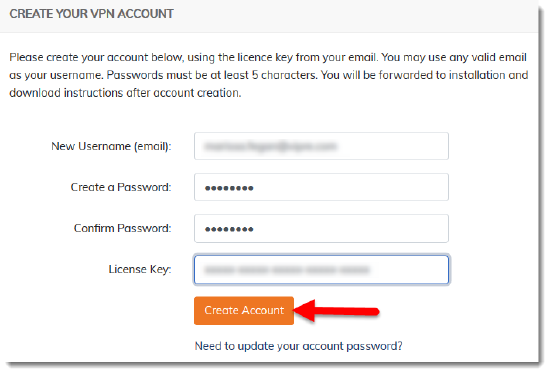
It is recommended that you create your VPN account before installing Internet Shield VPN. This allows you to log in to the application once it is installed on your computer or mobile device and will work across all operating systems.
- Navigate to https://myvpn.vipre.com/
- Fill out the form as directed and click the Create Account button
Installing Internet Shield VPN
Follow the steps below based on the Operating System for your computer or mobile device.
Android
- Locate Internet Shield VPN by VIPRE in the Google Play Store
- Select Install
- Internet Shield VPN will download and install
- Once the installation process is complete, select Open
- Enter the credentials from the account creation steps above then select LOG IN to open Internet Shield VPN
iOS
- Locate Internet Shield VPN by VIPRE in the Apple App Store
- Select Install
- Internet Shield VPN will download and install
- Once the installation process is complete, select Open
- Enter the credentials from the account creation steps above then select LOG IN to open Internet Shield VPN
macOS
- Click here to download Internet Shield VPN by VIPRE
- Run the InternetShieldVPN.dmg file that you just downloaded
- When the window opens, drag Internet Shield VPN by VIPRE to your Applications folder then close this window
- Open Launchpad or navigate to the Applications folder using Finder to start Internet Shield VPN
- Enter the credentials from the account creation steps above then select LOG IN to open Internet Shield VPN
Windows
- Click here to download Internet Shield VPN by VIPRE
- Run the InternetShieldVPN.exe file that you just downloaded
- Before proceeding, please review the license terms
- Once you have reviewed the license terms, check the box next to I agree to the license terms and conditions
- Select Install
- If you receive a User Account Control window, select Yes to allow VIPRE to install
- Once the installation is complete, select Close
- Double-click the desktop icon to open Internet Shield VPN by VIPRE
- Enter the credentials from the account creation steps above then select LOG IN to open Internet Shield VPN
VIPRE Privacy Shield
Once you have obtained VIPRE Privacy Shield (previously VIPRE Identity Shield), these steps will walk you through the installation.
Installation
Please follow the steps below to install and register VIPRE Privacy Shield:
- Download VIPRE Privacy Shield by clicking here.
- If prompted by your browser, save the .exe file.
- Go to the location where you saved the installation file and double-click VIPREPrivacyShieldSetup.exe.
- In Windows, it will be saved to your Downloads folder by default.
- In the Security Warning window, select Yes or Run.
- In the Setup Wizard window, select Install.
- The installation of Privacy Shield will begin. Once the installation is complete, VIPRE Privacy Shield will automatically open.
- Register VIPRE Privacy Shield by selecting Register Now.
- Enter your License Key and click Activate.

You're done! VIPRE Privacy Shield will begin scanning automatically and report back with all relevant issues and concerns about your private information.
Refer to our product guide for full details.