
By configuring outbound mail flow with VIPRE, any mail you send will be scanned and filtered per your policies and will be sent from a safe and reputable IP address which will help you avoid being blacklisted.
After you've configured inbound email so that it is secured by VIPRE Email Security, you may also configure outbound filtering to provide the same protections for outbound email that people in your organization are sending. Outbound filtering provides many of the same security and policy protections as inbound filtering and more. Plus, by sending your email through VIPRE, your mail will appear to come from a safe and reputable IP source that recipients will trust.
Routing of outbound email is similar to routing of inbound email:
.png)
In most scenarios, email authored by members of your organization will first be sent to your primary email host/provider (this could be an on-premises Exchange server, or it could be a hosted service), then it is forwarded to VIPRE Email Security. In this paradigm, VIPRE Email Security is acting as the smart relay that will deliver the email to the recipient, a so-called SmartHost. VIPRE will perform a number of filtering and policy matching steps on the email (for example, adding standard disclaimers) and then deliver the email to the ultimate recipient(s).
Configure VIPRE to accept email from your email service/provider
The first step in configuring outbound filtering is to set VIPRE Email Security so that it will accept email from your primary email service or provider. It is important to do this carefully, as a misconfiguration could result in exposing your domain for use by spammers. Essentially, we want to inform VIPRE that it should only accept email sent from specific senders, identified by IP addresses (the hosts that will send email) and domains (the people who will send email).
Select the appropriate option below:
On-Premises
- Login to https://email.myvipre.com/ using your Administrator credentials.
- Expand the Service Settings menu. Then, select Outbound Relay
- Click on the green plus sign (+), which will open a pop-up window

- Enter a descriptive name for the server that will be sending email, e.g. “Exchange Server” or “Clearwater Office”
- Enter the IP address of the server that will be sending email and select Save
- You can add additional mail server IPs by clicking the green plus sign (+) and following the above steps
- Confirm the Port number and Priority are correct and press the blue check to confirm
- When finished, select Save
Microsoft 365
In order for outbound email from Microsoft 365 to be routed through VIPRE, we need to create a new send connector in Microsoft 365 and point it to VIPRE.
Create a new send connector in Office365
- Log in to the Microsoft 365 Exchange Admin Center (EAC)
- Select the Admin > Exchange menu
- Select the Mail Flow > Connectors menu. Then, select Create a new Connector
- Set the mail flow scenario
- Select Office 365 from the From: drop-down
- Select Partner Organization from the To: drop-down
- Select Next
- Enter a name and description for the connector. You may also select the checkbox to make the connector active immediately
- Select Next
- Select the Only when email messages are sent to these domains option
- Select the plus (+) to add domains that should use this connector
- Enter a value of * (asterisk). This is a wildcard that will route all outbound emails through VIPRE
- Select Next
- Select the Route email through these smart hosts option
- Select the plus (+) to add your smart host
- You can find your smart host by clicking Get Started within the VIPRE Email Security portal

- You can find your smart host by clicking Get Started within the VIPRE Email Security portal
- Click the Save button
- Select the plus (+) to add your smart host
- Select Next
- Select the checkbox for Always use Transport Layer Security (TLS) to Secure the Connection (recommended)
- Select Issued by a trusted certificate authority (CA) from the list
- Select Next
- Add an email address of a recipient for a domain external to your organization, and select Validateto test
- If you did not choose to turn the connector on in Step 6, validation of the connector will fail. If your validation results show that the connection was successful, but the email failed to send because "The domain of the recipient is not configured as part of connector" - this may be due to the connector being disabled. Try enabling the connector and re-attempting the validation.
- Once Microsoft 365 has been successfully validated, select Save
- Once you are happy with mail flow, you may remove the old inbound route from VIPRE that points to the old on-site server if no other domains still use the old route
Google Workspace (formerly G Suite)
In order for outbound email from Google Workspace to be routed through VIPRE, we need to add an outbound gateway to Google and point it to VIPRE.
- Log into your Google Admin account
- Select Apps > Google Workspace > Gmail
- Scroll down and select Advanced Settings
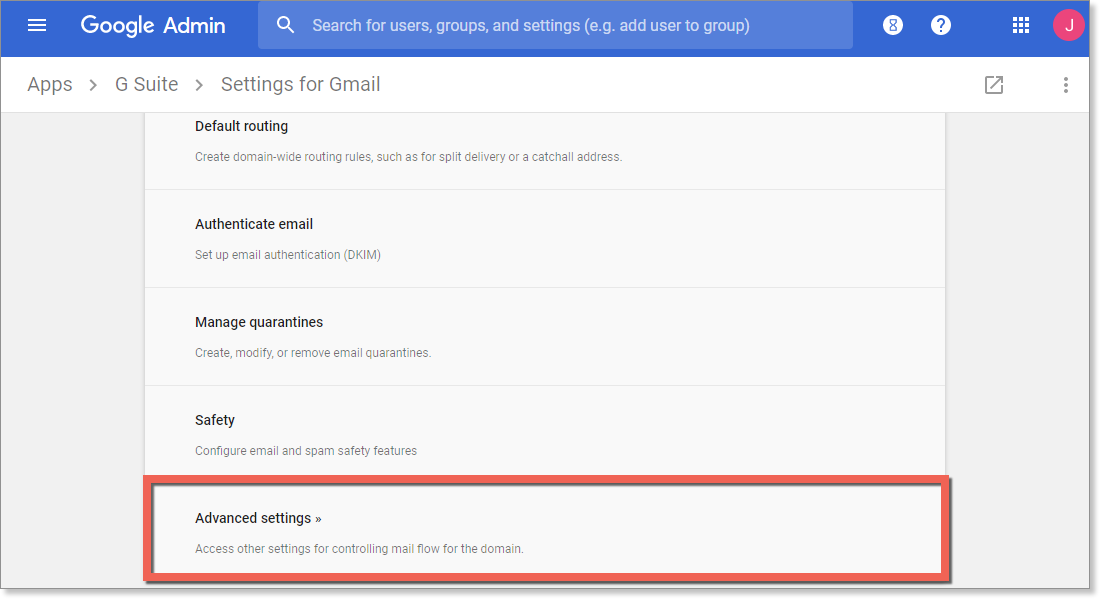
- In Advanced Settings, scroll down to Outbound gateway and type in your outbound gateway name
- You can find your smart host by clicking Get Started within the email portal

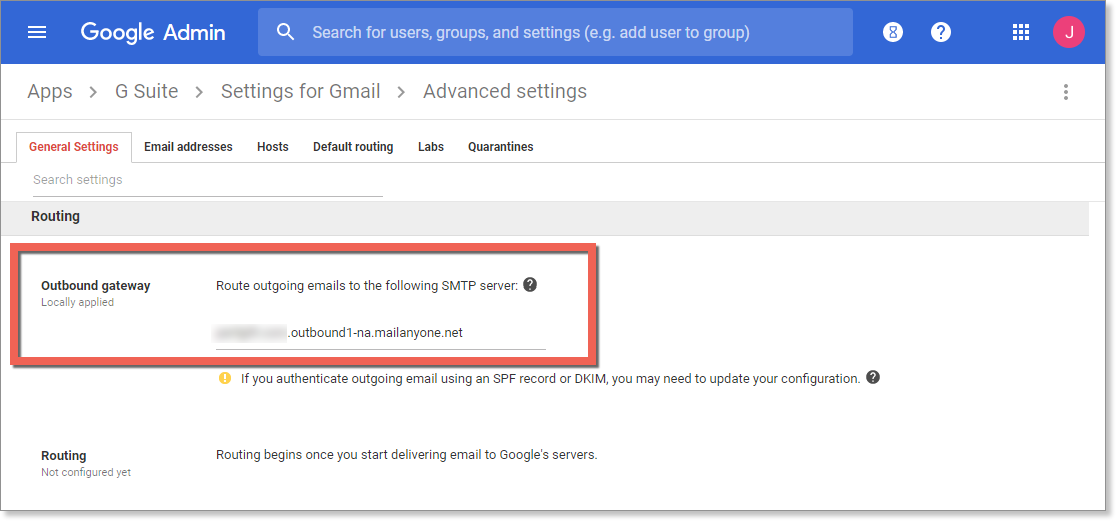
- You can find your smart host by clicking Get Started within the email portal
- In the bottom right of the screen, select Save