You're about to install VIPRE Antivirus Plus on your computer, but before we begin, let's review what you'll need to ensure VIPRE will install properly on your computer.
What do I need to install VIPRE?
This section will explain the software and hardware requirements for installing VIPRE Antivirus Plus.
Software Requirements
Important
Hardware Requirements
The computer you want to install VIPRE on will need to meet a set of minimum requirements, like having Windows 10 or higher, at least 1 GB of RAM, and a minimum of 1 GB available storage on your hard drive. For complete details regarding system requirements, click here.
We also strongly recommend access to a high-speed Internet connection as well as uninstalling any Antivirus program you may already have on your computer.
Now that you have all the requirements to complete a successful installation, let's begin!
Installing VIPRE Antivirus Plus
- Navigate to where you have downloaded and saved the VIPRE file called vipre-antivirus-plus.exe and double-click to open it
- If you are prompted by Windows User Account Control asking if you want to allow VIPRE to make changes to your computer, click Yes
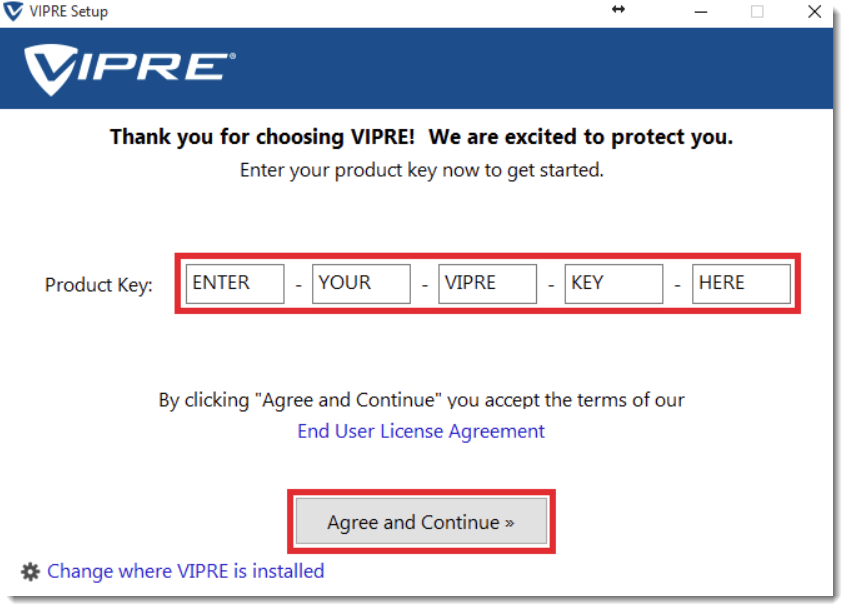
- VIPRE Setup will appear; enter the product key you received via email
- Ensure that you have read the End User License Agreement before clicking Agree and Continue
- If you do not want VIPRE to be installed in its default directory, select Change where VIPRE is installed at the bottom of VIPRE Setup
- Select Agree and Continue

Now, at this point, VIPRE scans your computer for other antivirus programs you might still have installed. If VIPRE doesn't find any other antivirus programs, VIPRE will begin installing. If VIPRE does find another antivirus program, you will be prompted to uninstall it before VIPRE begins installing.
Once installation is complete, click Continue to VIPRE.
Congratulations! Installation is now complete.