
To configure the VIPRE Email Security Cloud Link Isolation add-on, complete the following steps:
- From your Email Security Cloud admin portal, click on Service Settings in the left-side menu
- Select Link Isolation, then select a tab below to learn about the settings for that option
URL Filter Configuration
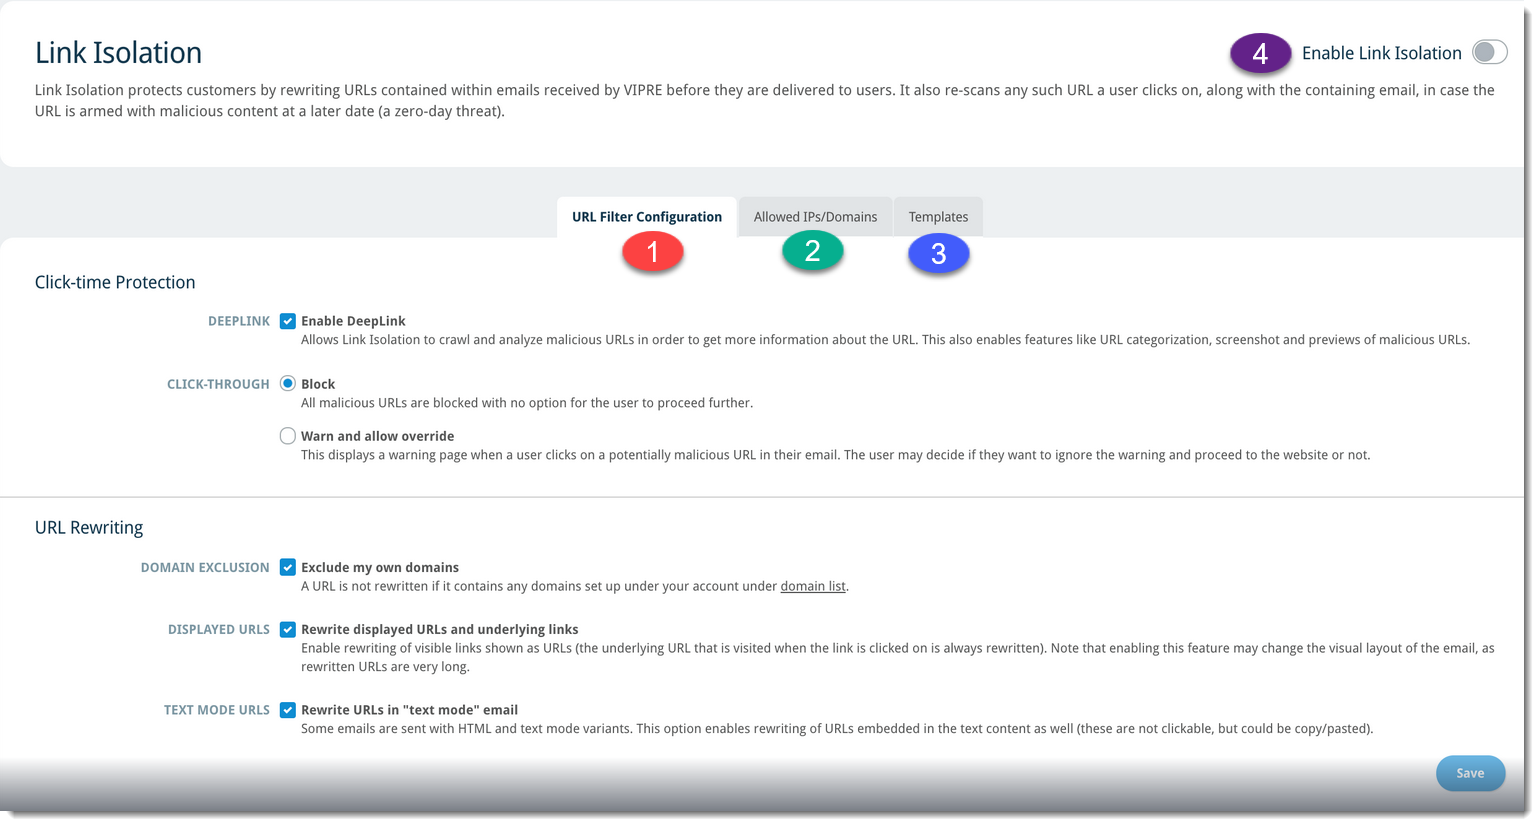
- On the URL Filter Configuration tab, select from the following options:
- Click-time Protection
- Enable Deeplink: This option allows Link Isolation to perform deep, cloud-based scanning to analyze malicious URLs and obtain more information; also enables URL categorization and screenshots/previews of malicious URLs
- Click-Through > Block: Blocks all potentially malicious URLs that have been clicked in the email; unable to proceed
- Click-Through > Warn and allow override: Displays a warning when potentially malicious URLs have been clicked in the email; gives the option to ignore the warning and proceed to the website
- URL Rewriting
- Exclude my own domains: URLs containing any of the domains you've added to your account will not be rewritten
- Rewrite displayed URLs and underlying links: Visible links shown as URLs will be rewritten; this may alter the appearance of the email as rewritten URLs can be quite long
- Rewrite URLs in text mode email: Rewrites URLs both in HTML and text mode; this may alter the appearance of the email as rewritten URLs can be quite long
- Click-time Protection
- Click Save
Allowed IPs/Domains
- Click on the + plus sign on the left side of the screen
- Type the IP address or domain in the text box - when adding multiples, supported separators are commas, semicolons, and space
- Any trusted IP address or domain can be added to this list as Link Isolation does not rewrite IP addresses or Domains on this list
- VIPRE recommends only adding trusted domains, like domains associated with your organization, to the Allowed IPs/Domains list
- Click Save

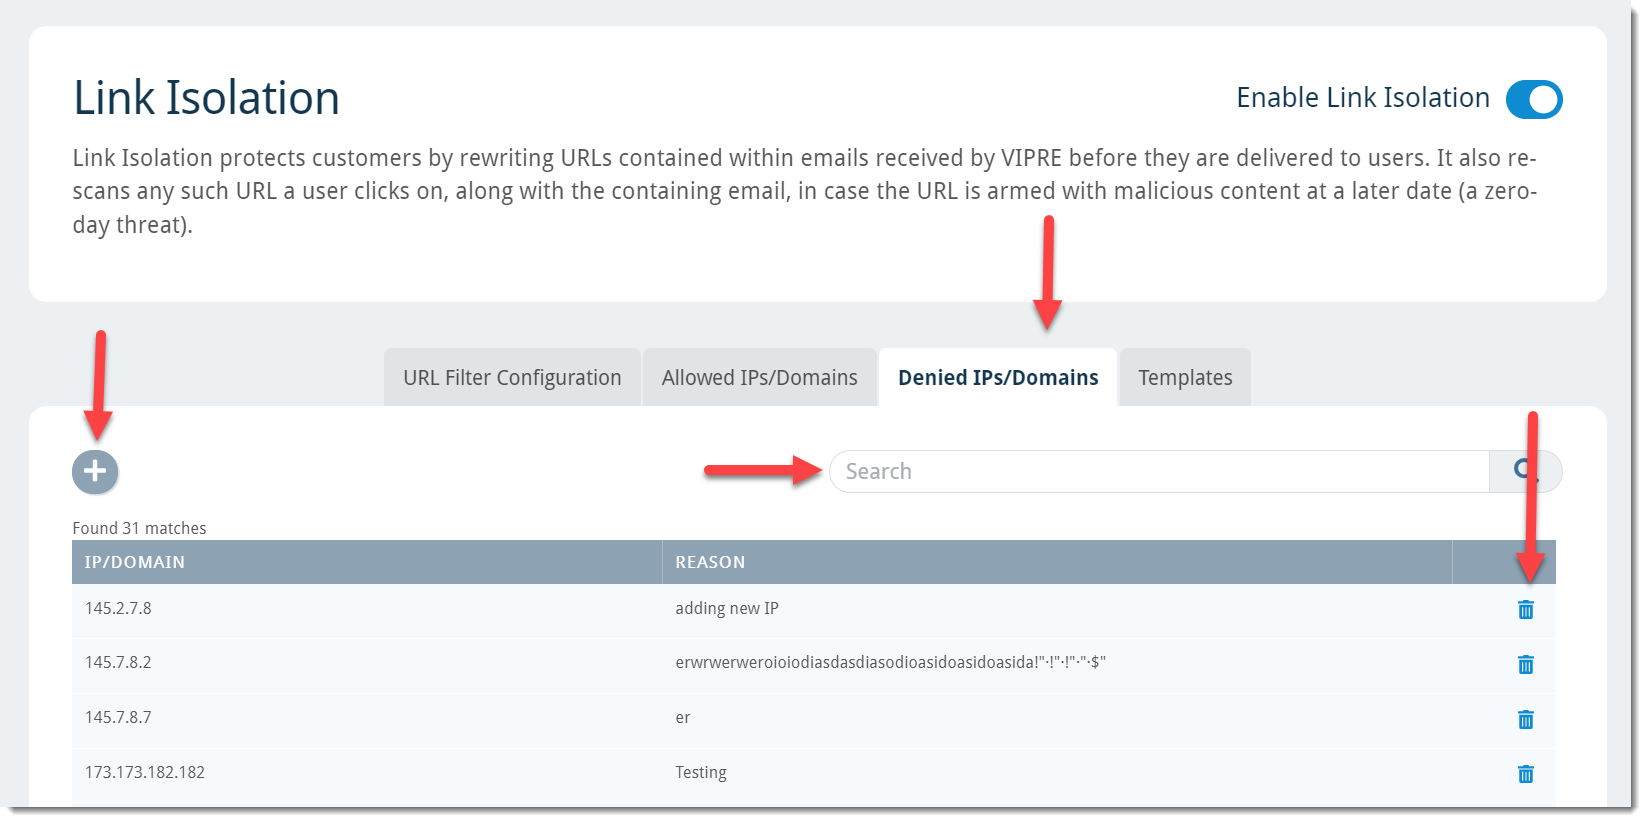
Denied IPs/Domains
To add an IP address or domain that you want to deny:
- Click on the + plus sign on the left side of the screen
- Type the IP address or domain in the text box
- Any untrusted IP address or domain can be added to this list
- Click Save
To search for a previously denied IP address or domain:
- Type the IP address or domain in the search box and press Enter
To delete a previously denied IP address or domain:
- Locate the desired IP address or domain and click the trash icon on the right side of the screen
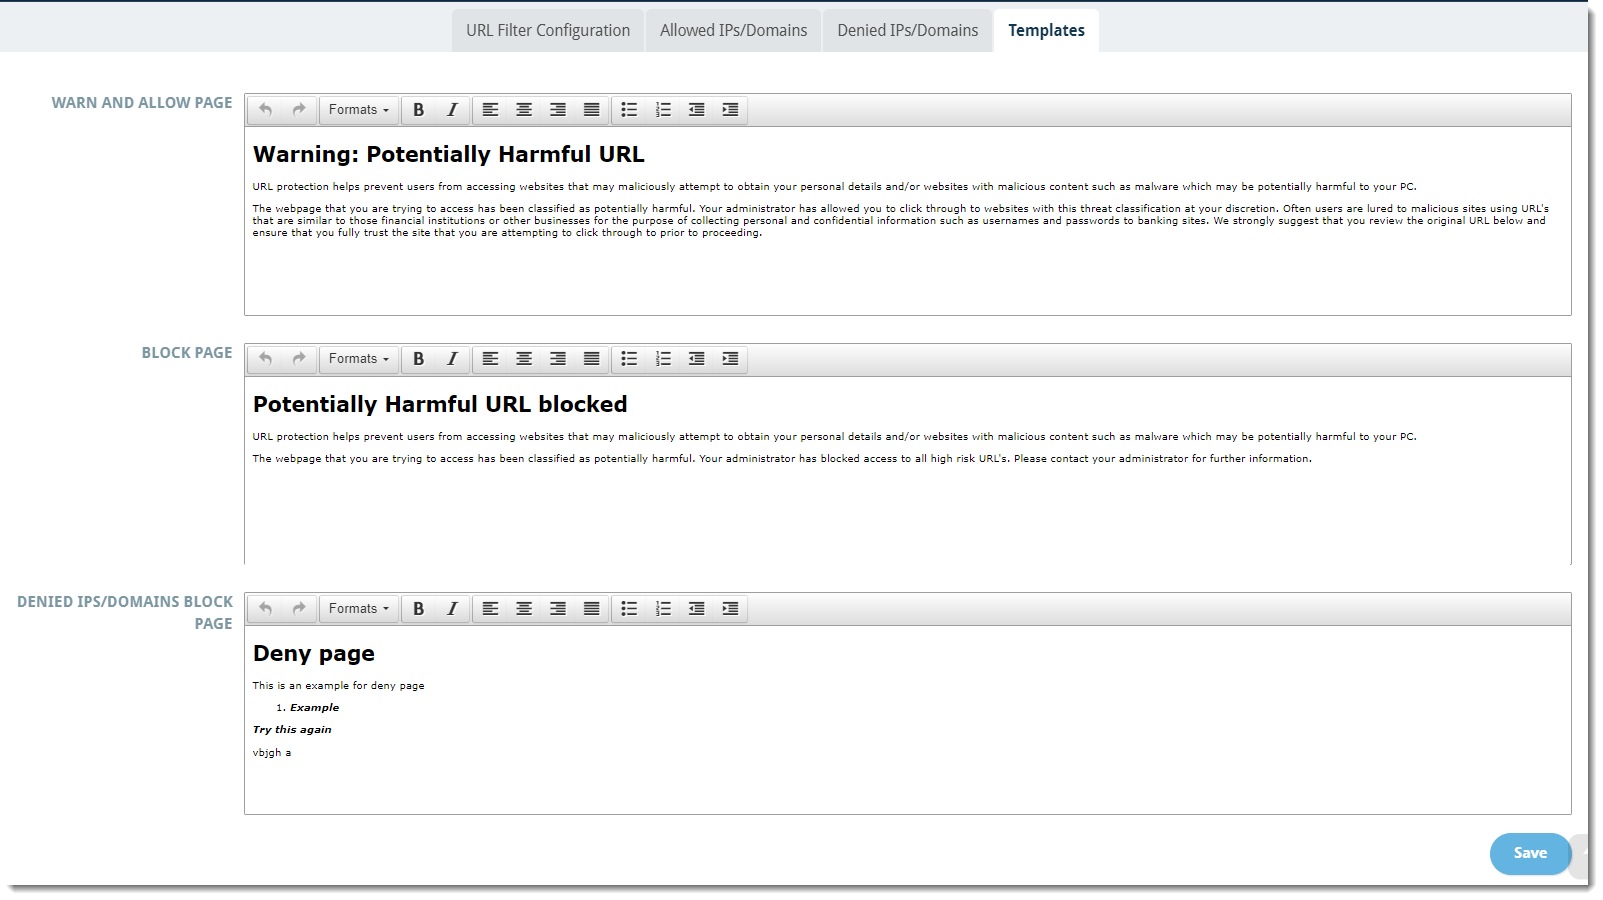
Templates
- This allows you to customize the message that your users see:
- When they click on the malicious URL based on whether you chose to Warn and Allow or Block Page under URL Filter Configuration
- When attempting to access an IP address or domain that has been denied
- Click Save
Enable Link Isolation
Once you've gone through the configuration options detailed in the tabs above, you're ready to enable Link Isolation.
- Scroll to the top of the screen and click the toggle next to Enable Link Isolation in the top-left corner
Congratulations! Link Isolation is now configured and enabled.