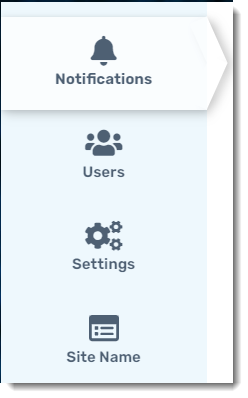
VIPRE Endpoint Detection & Response's System tab houses several ways to customize your experience. Select a topic below for full details.
Notifications
There are four different types of notifications:
- Threat Detected
- Incident Detected
- Health Digest
- Threat Digest
To add a new notification:
- Navigate to System > Notifications and click the Add Notification button in the top-left corner
- Name your notification
- Select the type of notification with a checkmark
- If you chose Threat Detected:
- Select one or more sources
- AP (Active Protection)
- Scan
- AMSI
- Exploit
- Ransomware
- Slide the severity bar to choose:
- Unknown severity and everything above it
- Low severity and everything above it
- Moderate severity and everything above it
- Elevated severity and everything above it
- High severity and everything above it
- Severe severity
- Select one or more sources
- If you chose Incident Detected:
- Slide the severity bar to choose:
- Unknown severity and everything above it
- Low severity and everything above it
- Moderate severity and everything above it
- Elevated severity and everything above it
- High severity and everything above it
- Severe severity
- Select a Remediation Status:
- Auto-Remediated
- Unhandled
- Slide the severity bar to choose:
- If you chose Health Digest or Threat Digest:
- Adjust the frequency you would like the notifications to be sent
- If you chose Threat Detected:
- Add email addresses of those you want to receive the notifications; emails should be separated by commas when adding more than one
- If desired, you can edit the subject of the email notification with options from the drop-down menu
- Set the scope to determine if the notifications should be across the whole site or only for a specific policy
- Select Preview to see a draft of what the email will look like
- Click Done to return to the previous screen and make changes if desired
- When ready, click Add Notification
You've created a new notification.
Users
VIPRE EDR supports two user roles: analyst and admin.
- Analyst role - limited to deploy agents, investigate threats, manage quarantine. Includes ability to view policies and exclusions, but cannot modify
- Admin role - full access to the configuration of the product, including policy creation and editing, exception definitions, and system settings. Includes all permissions of the analyst role
Create a User
As an admin, you may create users with either admin or analyst roles. You will need each user's first/last name and email address. A phone number is optional.
- Click System > Users > Add User
- Enter the user details
- Click Add User
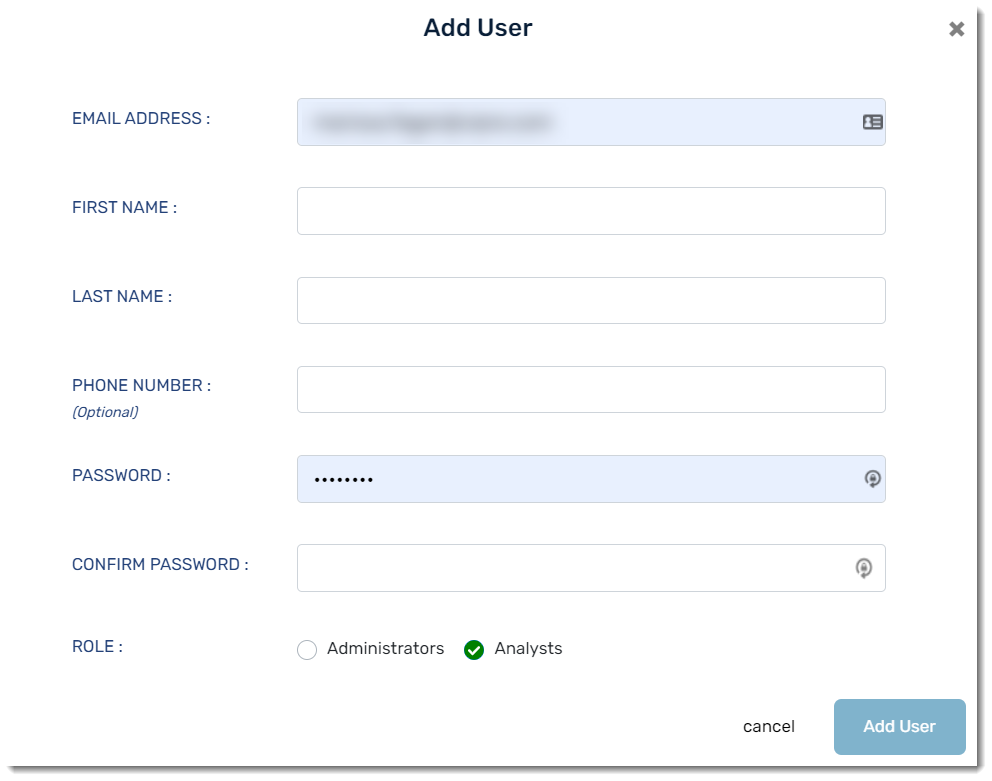
New users will receive a welcome email from VIPRE with their account confirmation, support details, a Log In button and site link. You will need to separately send each user their password or they can click reset password on the login page to change it.
Important
A user's email address is locked to their account. If a user's email address changes, you will need to create a new account for them.
Edit an Existing User
At any time, an admin may edit a user's existing information, reset their password, or change their role.
- Navigate to System > Users
- Under Actions, select one of the following options

- Edit User: Change first name, last name, phone number, or role
- Change Password: Set a new password for the chosen user
- Delete User: Permanently remove the user and their information from the system
This change takes effect the next time the user logs in.
Settings
The Settings page in the System tab enables you to adjust:
- Timezone - Selecting your local time zone affects scheduled events in VIPRE Cloud, such as timed notifications
- Disconnected Device Interval - How long before non-responsive devices are considered to be disconnected
- Outdated Definitions Interval - How long before current definitions are considered outdated
- Update Agent - Whether to auto-approve new Agent software releases, or notify the admin
Timezone
To change the timezone:
- Choose your timezone from the drop-down
- In the top-right, select Update settings
Important
The selected timezone affects the scheduling of Email Digest notifications and scheduled updates. It does not affect dates and times in the VIPRE Cloud user interface.
Disconnected Device Interval
The Disconnected Device Interval setting is the amount of time that passes before VIPRE Cloud marks a non-communicating device as disconnected. You may choose between 1 and 15 days; the default setting is 3 days.
To change the Disconnected Device Interval:
- Choose a number of days from the drop-down
- In the top-right, select Update settings
Outdated Definitions Interval
The Outdated Definitions Interval setting is the amount of time that passes after a definitions release before VIPRE Cloud considers the current definitions to be outdated. You may choose between 1 and 15 days; the default setting is 3 days.
To change the Outdated Definitions Interval:
- Choose a number of days from the drop-down
- In the top-right, select Update settings
Update Agent
The Update Agent setting determines whether new agent software updates are made available to your devices automatically, or if notification (and manual approval) should occur.
To change the Update Agent setting:
- Select one of the following:
- Auto approve - Makes the latest agent software update immediately available to devices that request an update
- Notify - Sends a notification email to administrators; no new agent software is available until manually approved
- In the top-right, select Update settings
The agent software update process can be customized many ways, depending on your organizational needs and your test environment requirements. See Manage agent software updates for additional information on how the process works, and which options to consider when making this change.
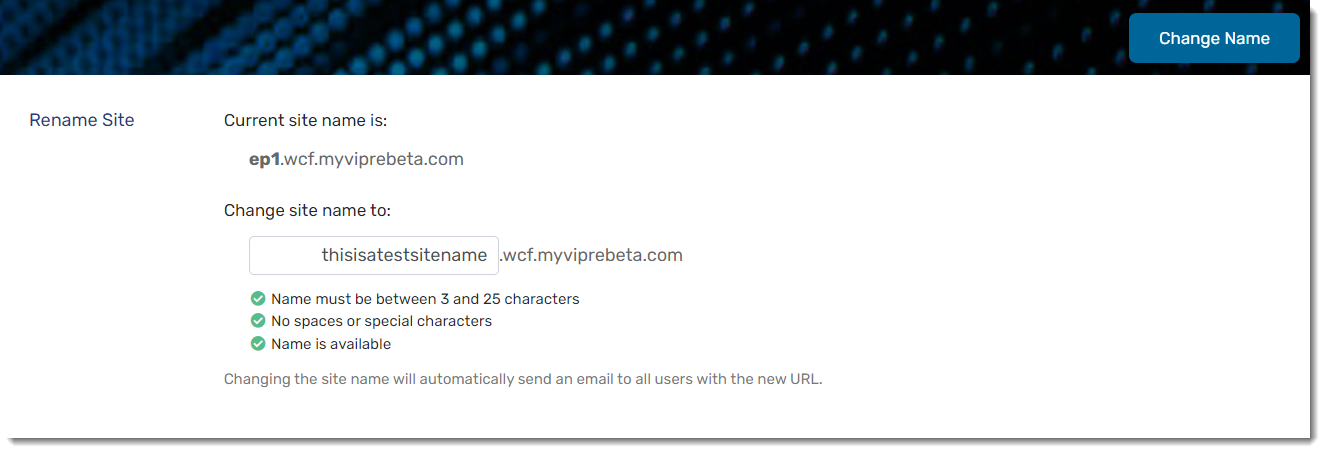
Site Name
You can find your current site name and rename your site if you desire.
Important
Changing your site name will change the URL you use to access VIPRE Endpoint Detection & Response. Once you change the site name, an email is automatically send to all users with the new URL.
To change your site name:
- Navigate to Setup > System > Site Name
- Here is where you can see your current site name
- Under Change site name to: you can add your new name in the textbox
- Your new site name must be between 3 and 25 characters long
- Your new site name must not contain spaces or special characters
- Your new site name must be available
- Click the Change Name button in the top-left corner of the screen
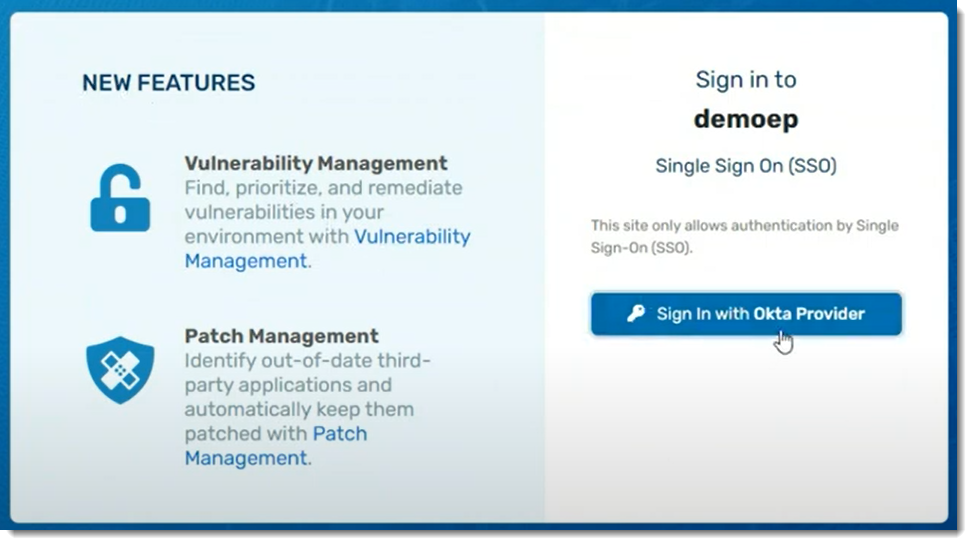
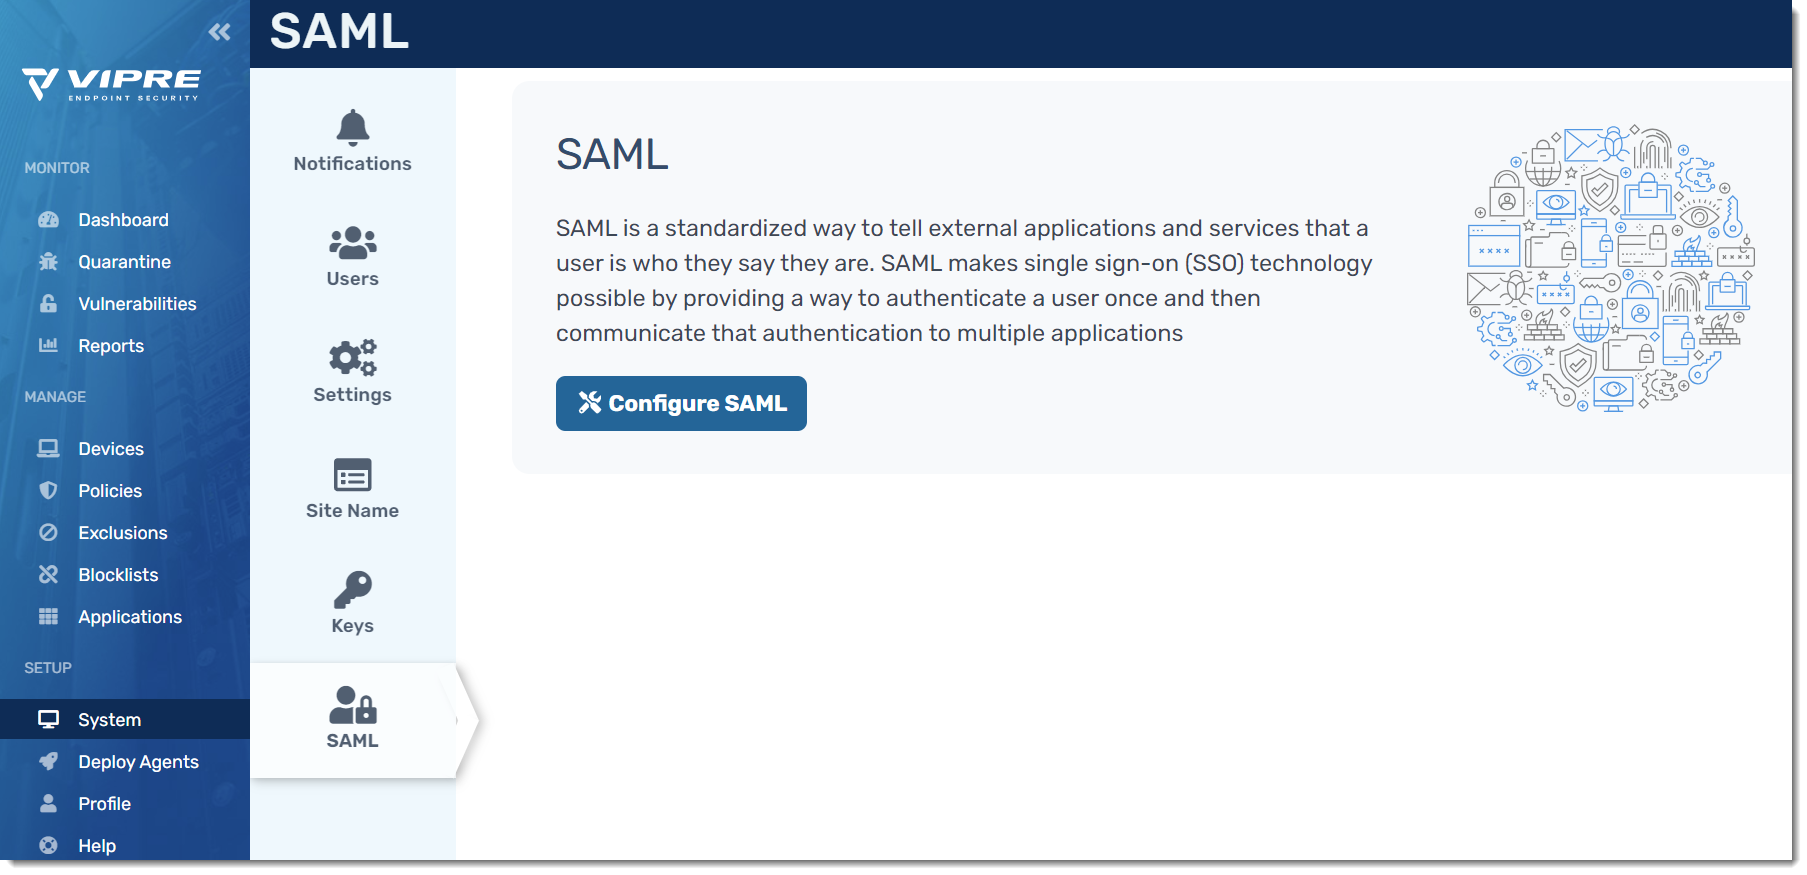
SAML
VIPRE Cloud supports using SAML, allowing for integration with SSO identity providers.
What is SAML?
SAML (Security Assertion Markup Language) is an open standard that allows for authentication and authorization between an identity provider (IDP) and a service provider (SP).
Configuration
SAML configuration occurs in the IDP admin portal and the VIPRE Cloud admin portal.
We've provided Okta-specific instructions for configuring SAML with VIPRE Cloud for single sign-on below. If your IDP is not Okta, you can still use the instructions below as a general guide. If you require further assistance, contact Technical Support.
- Log in to your VIPRE Cloud portal
- On the left-side menu, find SETUP
- Click System, then select SAML
- Click Configure SAML
- You will presented with Service Provider Metadata, giving you options to download the XML or copy the metadata and manually add it to your IDP
- For this example, we are going to copy the metadata manually
- Open a separate browser tab and navigate to your Okta admin portal
- In your Okta portal, select Applications > Applications on the left-side menu
- In the main part of the screen, select Add Application
- Click Create a New App in the top-right
- Select SAML 2.0 as the Sign on Method and click Create
- On the General tab, under SAML Settings, click Edit
- App name can be any name you want to use to identify the VIPRE Cloud application within Okta
- All other options are based on your organization's desired decisions
- Click Next to get to the Configure SAML screen within Okta
- Go back to the browser tab that has your VIPRE Cloud portal open and copy the Entity ID from the Service Provider Metadata screen
- In the browser tab that you're using for Okta, paste the Entity ID into the Audience URI (SP Entity ID) field
- Go back to the browser tab that has your VIPRE Cloud portal open and copy the Single Sign On URL from the Service Provider Metadata
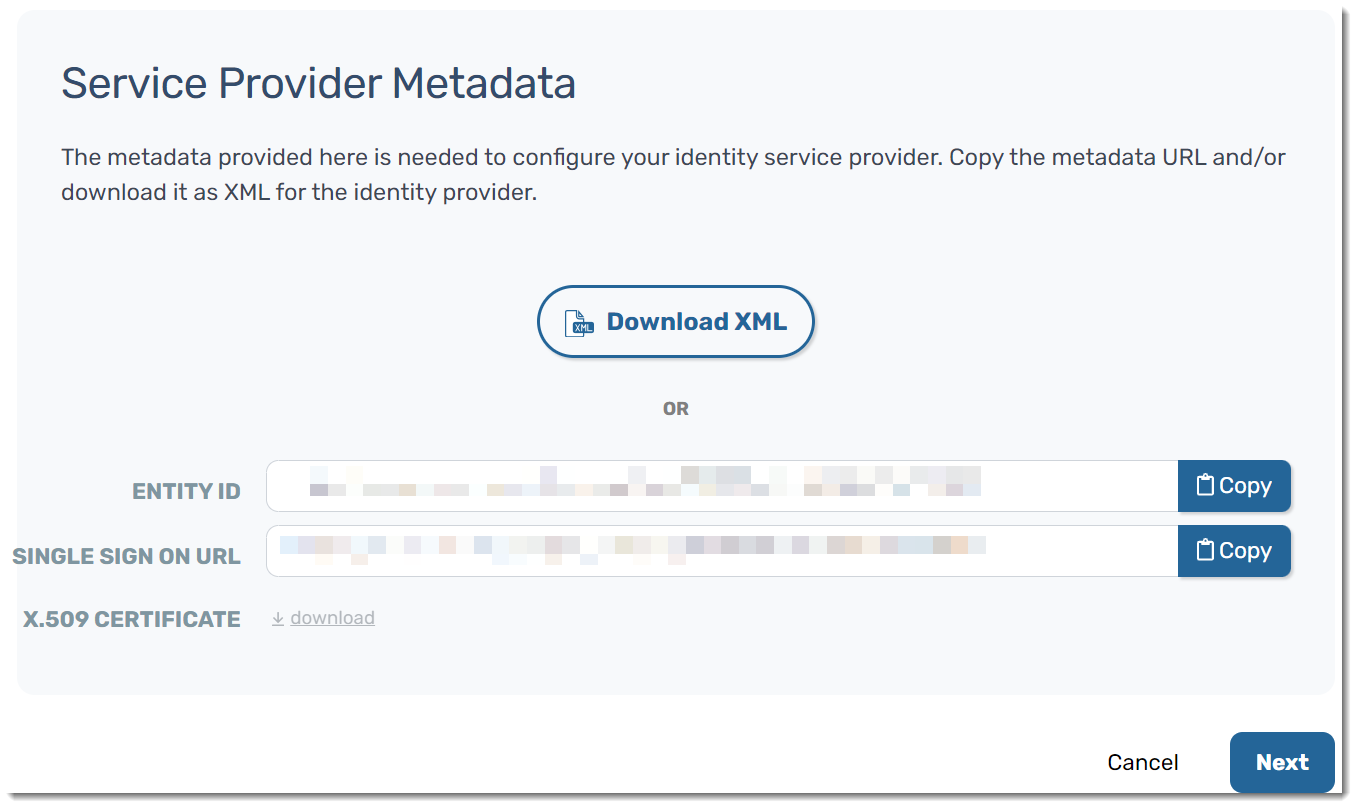
- In the browser tab that you're using for Okta, paste the Single Sign On URL into the Single sign on URL field
- Under Single sign on URL, Use this for Recipient URL and Destination URL should already be checked by default
- Ensure the following configurations are set in your Okta portal:
- Name ID format should be set to EmailAddress
- Application username should be set to Email
- Scroll to the bottom of the page and click Next
- Click Finish
VIPRE Cloud is now configured in Okta. The next step is to configure Okta in VIPRE Cloud.
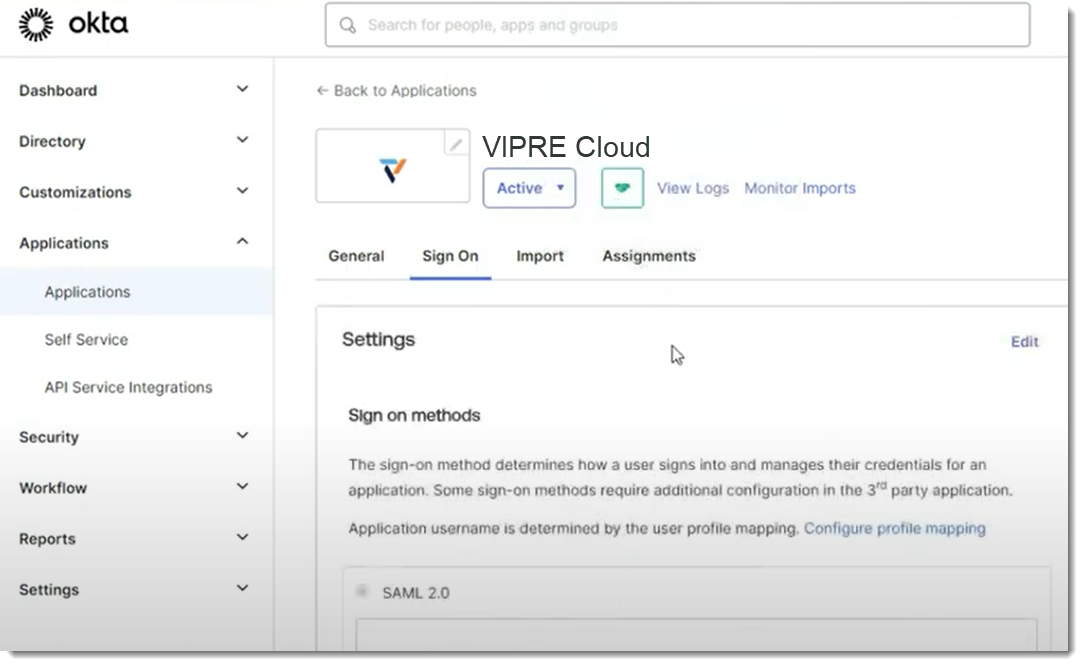
- You will see the Okta Application screen; click on the Sign On tab to find the Identity Provider Metadata
- In a separate browser tab, navigate to the MetadataURL from Okta and download the XML file
- Go back to the browser tab with VIPRE Cloud portal and click Next to get to the Identity Provider Metadata page
- Drag and drop the XML file in the box or click Select a file… to upload the XML file you downloaded in Step 22 above

- The Entity ID and Single Sign On URL will be filled in; next to Provider Name, enter how you want this to appear on the VIPRE Cloud sign-in page
- Click Next
- Here, we will test our SAML setup
- Step 1: Copy the login URL into a new browser tab
- You should see the login page for your IDP
- Step 2: Enter your credentials and log in to your IDP
- Step 3: Review the results of the test
- Step 1: Copy the login URL into a new browser tab
If you need to review the log or redo the test, you can complete those actions at the bottom of the page.
- Click Next
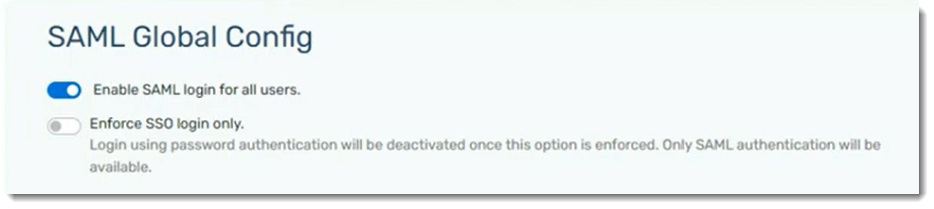
- The SAML Configuration Summary page allows you to see all of the settings in one place; when you are ready, click Save & Enable
Once SAML is enabled for all users, you can choose to enforce SSO login only, deactivating password authentication.
Congratulations! SAML SSO is now configured for use with your VIPRE Cloud site.