Installing VIPRE is quick and easy. Just follow the steps below to install on your Mac.
Important
After VIPRE is installed, you must allow VIPRE in your Mac Security Preferences so that it can run.
Please note that this is for macOS devices (Laptop and Desktop computers running macOS) only and does not apply to iOS devices (iPad and iPhones). For full details on the system requirements, please refer to the System Requirements.
Install the VIPRE application
- Download the VIPRE installer to your Mac
- Double-click the downloaded .pkg file to begin the installation

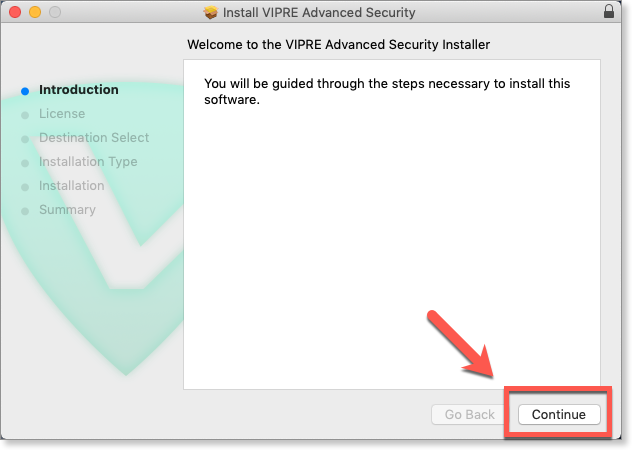
- On the Introduction screen, click Continue
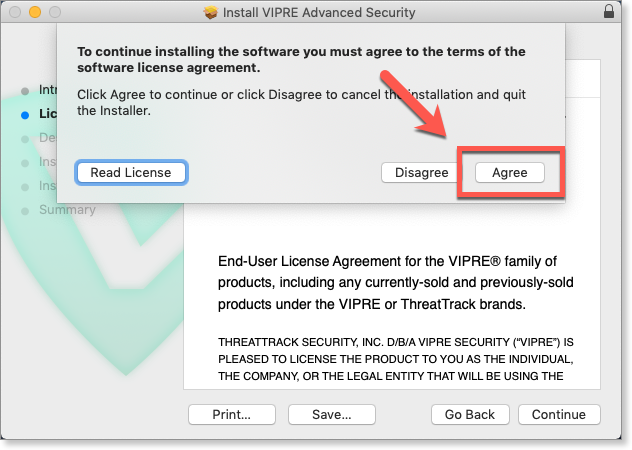
- On the License screen, you’re presented with the End-User License Agreement. Click Continue
- Review the license agreement. If you agree with the terms, click Agree
.png)
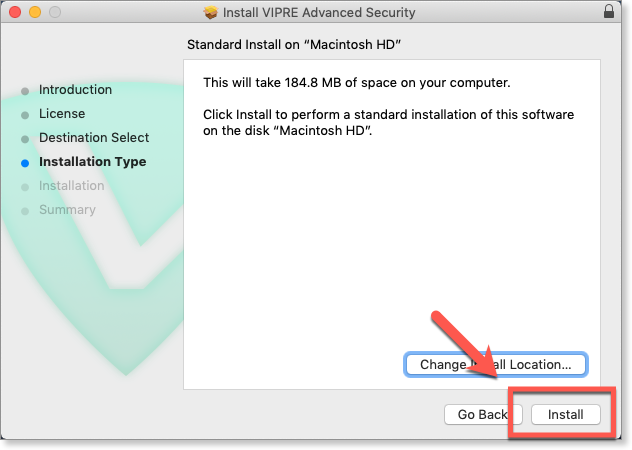
- On the Installation Type screen, choose an install location, or click Install to use the default
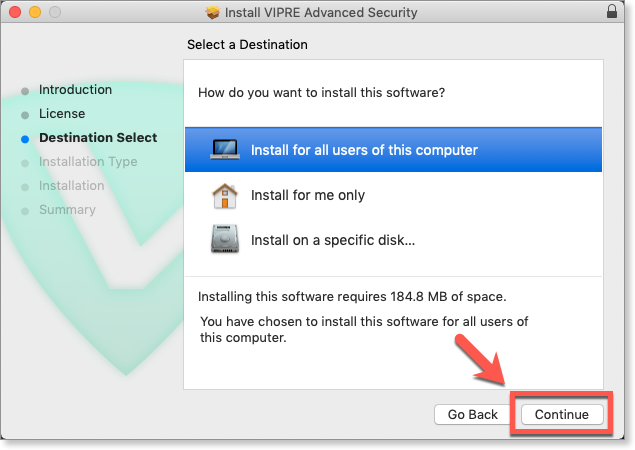
- On the Destination Select screen, click Continue
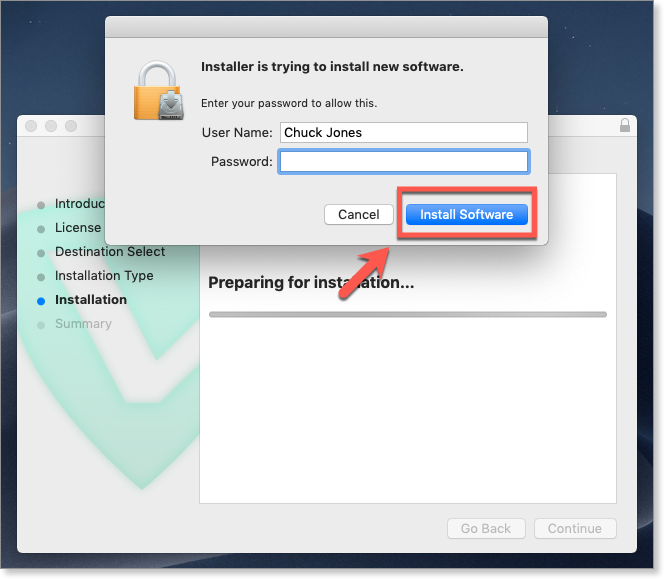
- The installer will ask for an admin User Name and Password to continue. Enter your User Name and Password and click Install Software
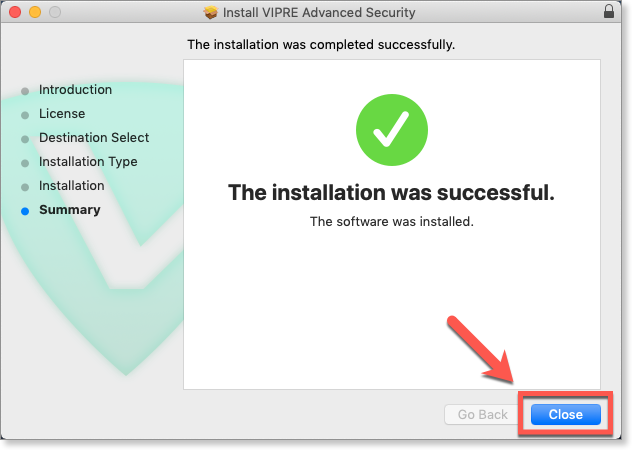
- The installer will copy the application to your hard disk. When you see “The installation was successful,” click Close to finish
Adjust your Security Preferences
Next, you must allow VIPRE in your Security Preferences so that VIPRE can properly run.
- If you're following our Guided Welcome Path, proceed to the next page.
- Otherwise, see this article to edit your Mac's Security Preferences.