
When looking at the device details, there are several available options, and one of those options is "Isolate from Network", also known here as Device Isolation. This article will further explain this option. Refer to Related Articles for additional details about all parts of the EDR Devices screen.
Isolate from Network
The Isolate from Network option is used for any endpoint with the VIPRE Agent installed that you want to prevent from communicating with any other devices on or off your network.
Now, even though the Isolate from Network option stops traffic to/from a particular device, there are exclusions that are basically rules you can configure. When any incoming or outgoing traffic matches the exclusion, that traffic will be “excluded” from the device's isolation status and allowed through.
Isolation Exclusions
Exclusions here are not mandatory but it is important to remember when you have isolated an endpoint from the network without exclusions as it could help prevent users from reporting that they cannot access anything on their device.
Implementing Device Isolation
These instructions assume you're already investigating an incident and have selected a device from the Incidents page. Any action taken on the device from the incident page (e.g., isolate, remote shell, etc.) will be recorded in the Incident History page. It’s worth noting that you can navigate to Manage > Devices and select a device from there as well.
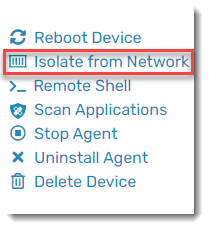
- On the Device Details screen, in the top right corner, you'll see a list of available options; select Isolate from Network
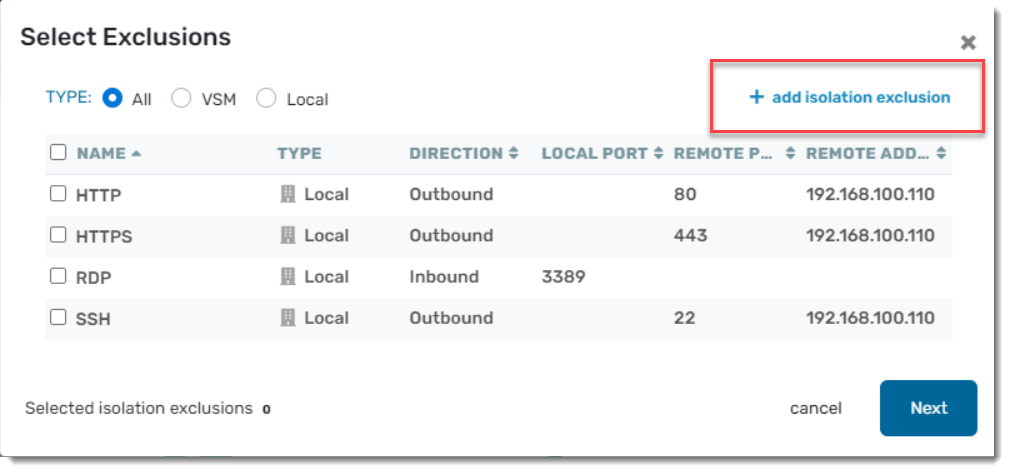
- The Select Exclusions screen will pop up, allowing you to create a new, or select an existing, exclusion
- Exclusions are not mandatory and if none are created, the default settings will be used
- Click + add isolation exclusion to expand exclusion options
- Name your exclusion by typing in the text box
- Choose a direction from the drop-down menu
- When using a local port, the direction will typically be set to Inbound
- When using a remote port, the direction will typically be set to Outbound
- Setting the direction of Both is possible but it isn't typical
- Add a local port number or a remote port number
- Local port would be used usually for inbound ‘listening services’ that you need access to
- Remote port would be used for any outbound services you need to connect to
Important
When creating an isolation exclusion, if both Local Port and Remote Port are defined within the same exclusion, only traffic matching both ports will be allowed in or out.
- If using Remote Port, include the remote IP address in the text box under Remote Address
- Click Add Another to create more or the Add Exclusion button when you're done
- When defining and applying isolation exclusions, use only what you truly need to complete your investigation; if you add too many exclusions, you increase the chance of allowing malware to spread
- Your newly created exclusion will now show in the list; select the checkbox and click Next
- A confirmation will appear asking you if you're sure you want to isolate this particular device from the network; type in a brief summary of why you're isolating the device
- Click the Isolate button
The endpoint will now show a Pending Isolation status at the top of the Device Details screen. Once the isolation request goes through, the endpoint will be isolated and the status will change to Isolated at the top of the screen. From here, you can either remove from isolation or update isolation, which would allow you to add or remove exclusions.

Now that your device is isolated, you'll notice a change in the options that are available on the Device Details screen.
