
This path steps you through creating a new customer account, branding, and finally full configuration.
Step 1: Gather MX Records and Delivery Information
You'll need the listed MX and IP information in order to completely set up your customer.
Before You Begin
In order to successfully provision your customer, you will need to know the following:
Domain being protected by VIPRE Email Security
For example, vipre.com.
Destination IP address
This is the IP where we will deliver mail.
If you're using an on-premise server, this is most likely the IP address of your Exchange server. This is the address where your existing mail gets delivered to.
This could also be an Office 365 or Google Apps IP address.
Sending IP address
This is the IP where we will receive mail from – outbound filtering.
The reverse IP of the destination, above. If you're sending from an Exchange server you can find your public IPv4 by visiting http://www.whatismyip.com.
-
Next Step
- Add Button
Step 2: Create a Customer Account
Note: This content is intended for Managed Service Providers only. If you have arrived at this page and are not an MSP, please see our main VIPRE Email Security - Cloud Edition content or visit the start page of the VIPRE Success Center.
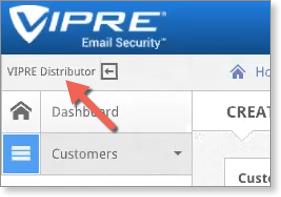
Log in to VIPRE Email Security
Log in to https://email.myvipre.com using your credentials.
Once logging in, you should be at the VIPRE Distributor level.
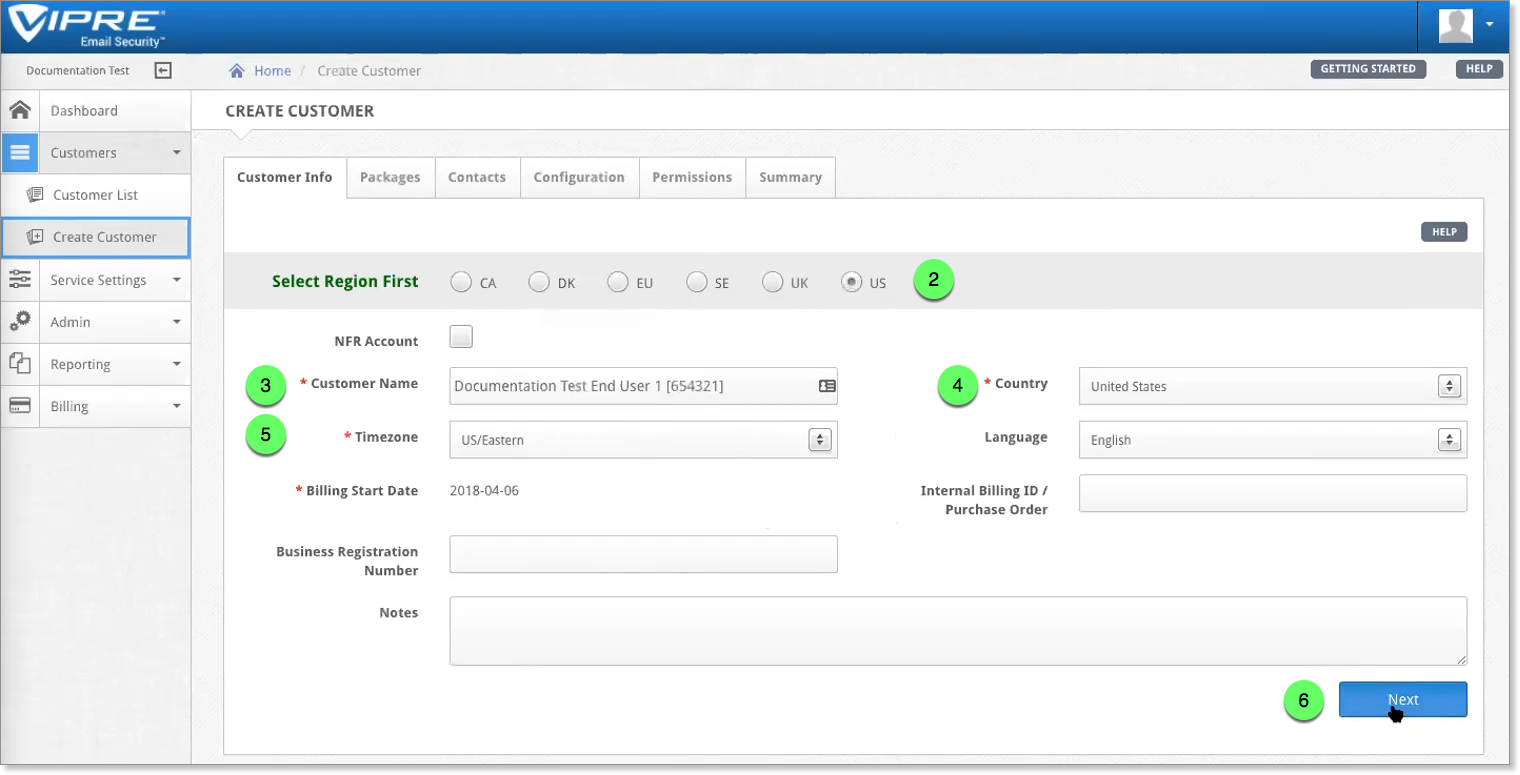
Customer Info
- From the main menu on the left, select the Customers tab to expand it. Then, select Create Customer
- Select the customer Region
⚠️ Note: The default region is set to UK. You must manually select your region if you are in- Canada
- Denmark
- Europe
- Sweden
- United States
- Fill in the Customer Name
- Select the Country
- Select the Timezone
- Select Next
Packages tab
- For now, there is only one package to select: SecureSMART Suite. Select it by choosing Subscribe
- Select Next
Contacts tab
- Fill out the customer address. All other fields remain as the default options.
- Select Next
Configuration tab
- Fill out the following options:
- Domain - Enter the customer's domain in the Domain field and select Add
- Verify Users - Select via User List/LDAP
- Server - Enter the customer's destination mail server IP address
- Route - Enter the source mail server IP address. This is typically the same IP address as the Server, above.
- Select Next
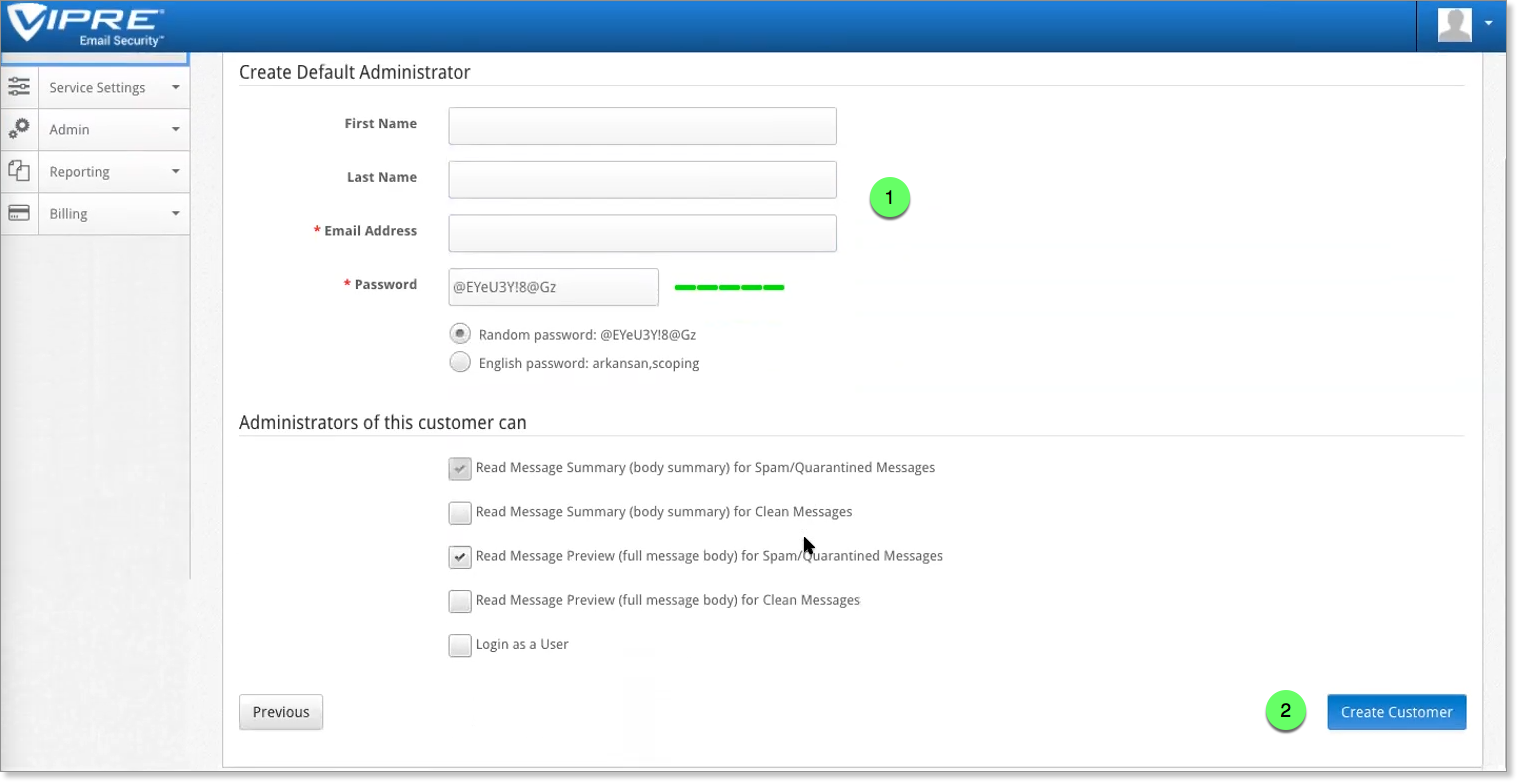
Permissions tab
Every customer has to have a Default Administrator, even if it is never used.
- Fill out the following options:
- First Name - Administrator's first name
- Last Name - Administrator's last name
- Email Address - Administrator's email address
- Password - Select Random password
- Select Create Customer
- Review the on-screen information, and select Complete to finish.
Complete
Now we see that under the [ 1 ] Reseller Account (Documentation Test, in this example), we have the [ 2 ] End User Customer created.
At this point, selecting the [ 2 ] End User Customer allows us to navigate into the customer account and review their settings:
The end user customer settings are a blank slate when we first create the customer.
-
Next Step
- Add Button
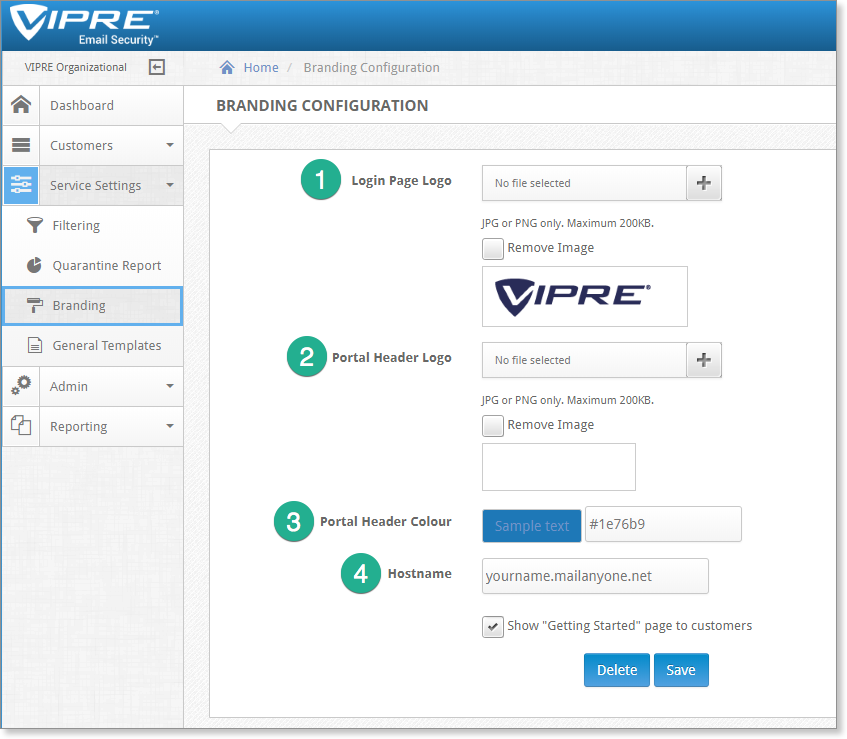
Step 3: Brand your Console
This article steps you through adding your business logo on the console and login screen.
Log in to https://email.myvipre.com using your credentials.
Once logging in, you should be at the VIPRE Distributor level.

Select your branding
On the main menu, select Service Settings to expand it, then click Branding.
Upload your custom branding graphics as follows
- Login Page Logo - Upload your company logo here. This graphic displays on the login screen.
- Portal Header Logo - Upload your company icon here. This graphic displays in the top left of the header bar.
- Portal Header Colour - Change the color of the top header bar here, in hex.
- Custom Hostname - If you have a custom hostname, enter it here. Note: Custom hostname requires an SSL certificate, which you may need to purchase.
Click Save to apply your changes.
-
Next Step
- Add Button
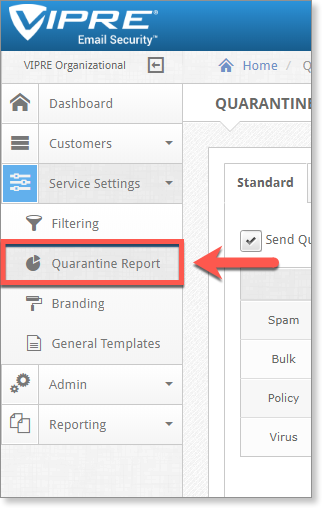
Step 4: Brand your Quarantine Report
This article steps you through customizing the look and feel of the Quarantine Report.
Log in to https://email.myvipre.com using your credentials.
Once logging in, you should be at the VIPRE Distributor level.
.png)
Customize the Quarantine Report
On the main menu, select Service Settings to expand it, then click Quarantine Report.
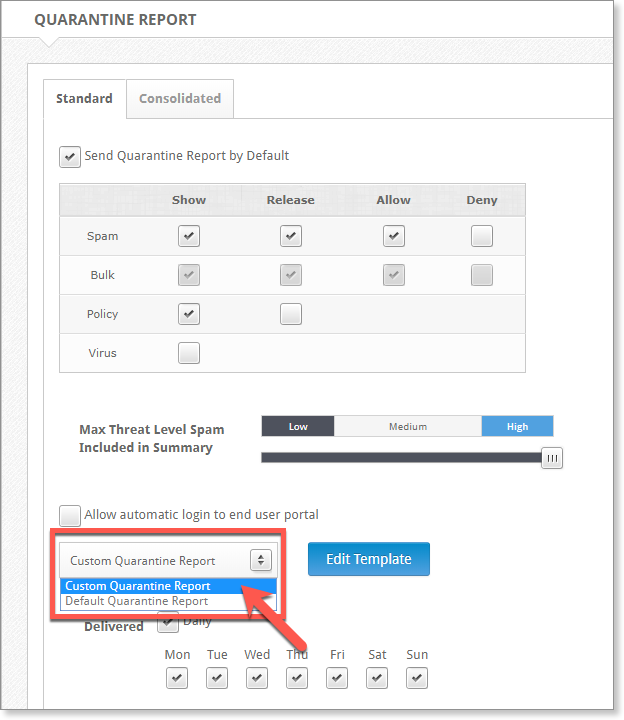
On the Quarantine Report screen, select Custom Quarantine Report from the drop-down. Then, click Edit Template.
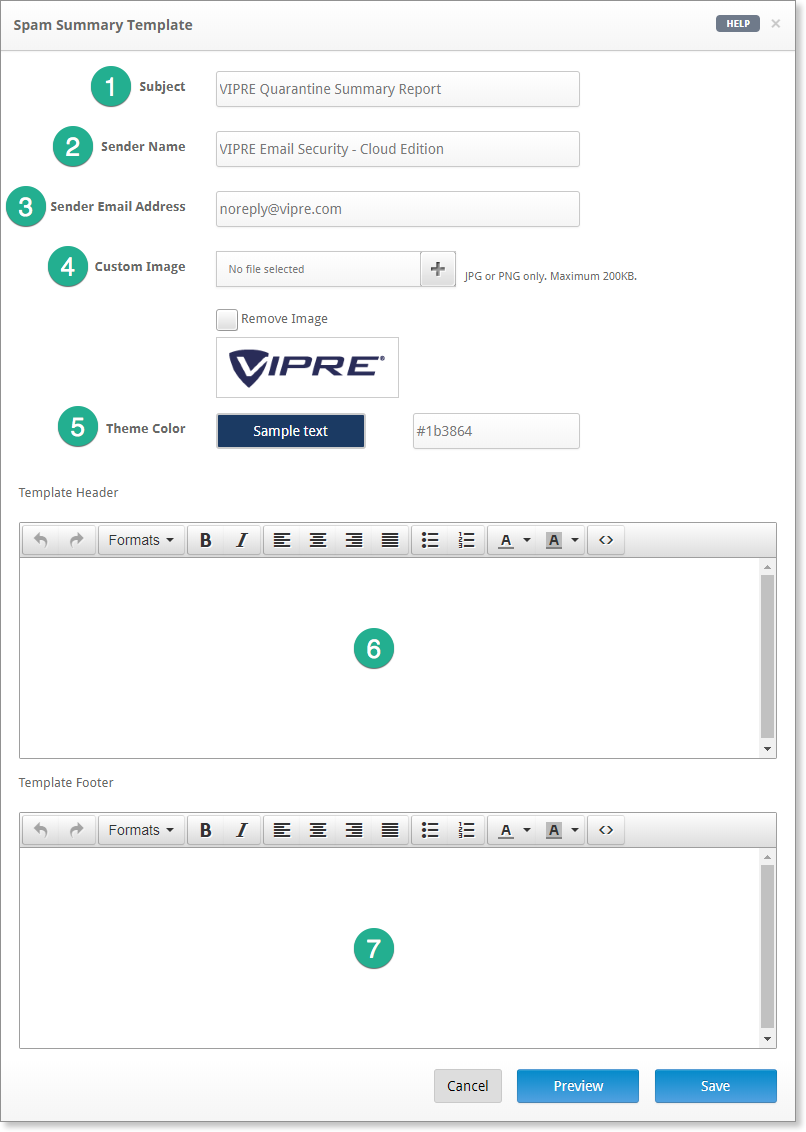
Fill out the custom template as follows
- Subject - Enter a custom subject line for the quarantine email
- Sender Name - Enter the display name to appear as the sender of the email
- Sender Email Address - Enter the email address that the message will come from
- Custom Image - Upload your company logo here, to be displayed inline with the email
- Theme Color - Enter the color of your theme here, in hex
- Template Header - Add customer header text here
- Template Footer - Add customer footer text here
Click Preview to see a sample email with your changes applied. Then, click Save to apply your changes.
-
Next Step
- Add Button
Step 5: Configure your new Customer
Once the customer is provisioned, we can step through the configuration and mail setup
- For a guided walkthrough, refer to our Email Security Cloud Guided Setup
- To choose which specific topics you'd like to review, visit our VIPRE Email Security Cloud Basics Guide
Congratulations! You have successfully created, branded, and configured a new customer.