
Post-Migration, these are all the steps you can take to verify that your endpoints, settings, policies, and exclusions have all properly been migrated to VIPRE Cloud.
At this point in the migration process, you have
- Set up VIPRE Cloud
- Migrated your policies, exclusions, and other settings
- Deployed VIPRE Cloud agents to your endpoint devices
The migration process likely went smoothly, but it's always a good idea to double-check your settings and confirm – especially if you have a large or more complex deployment.
The items in this article will help you review common checklist items and verify the migration is complete.
Goal
This article can serve as a "verify checklist", or a jumping-off point for minimum post-migration steps that you should follow. Ideally, you'll have already generated your own checklist during the preparation phase of your migration; in lieu of that, below are our recommended items.
There may be more steps here than necessary. Ultimately, the decision to review or follow up on these items is up to you.
Verify all Endpoint Devices are Active
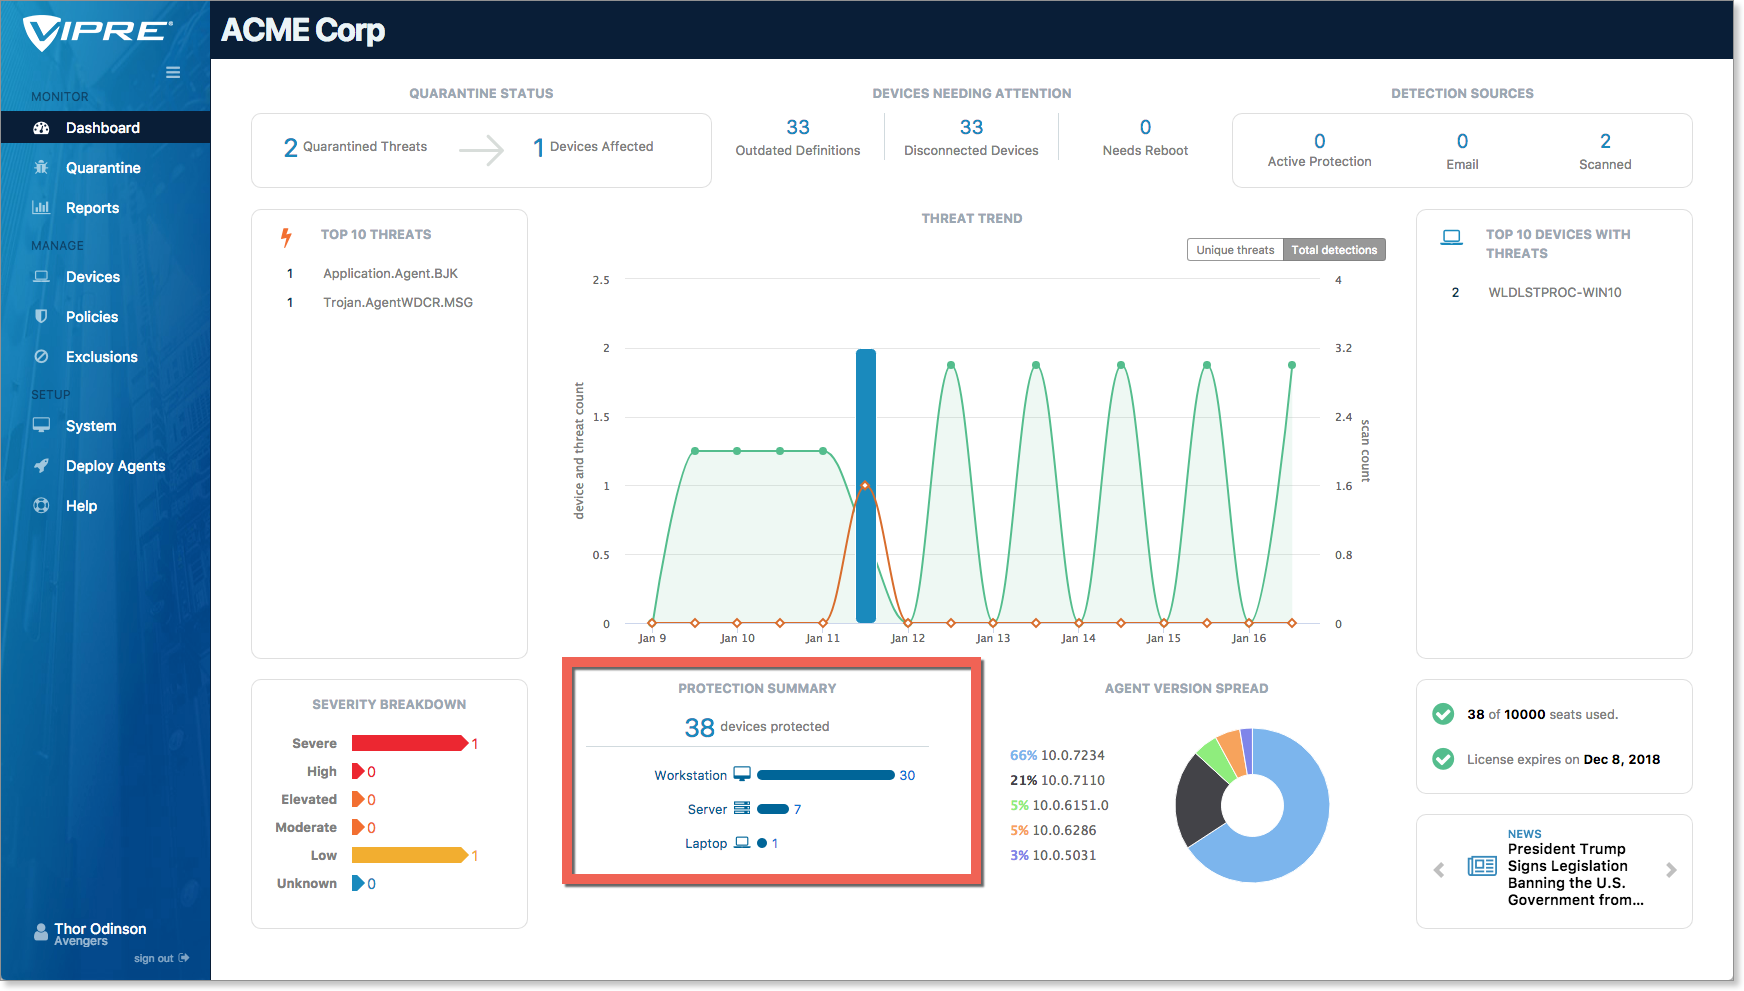
From the dashboard, check your Protection Summary
This confirms that all endpoints are now running Endpoint Cloud agent software, and are communicating with Endpoint Cloud.
- Ensure all of your machines (known in Endpoint Cloud as devices) from your pre-migration list are showing as protected.
- Select the devices number to display all the devices in detail. The devices number should match the number of machines that you have migrated.
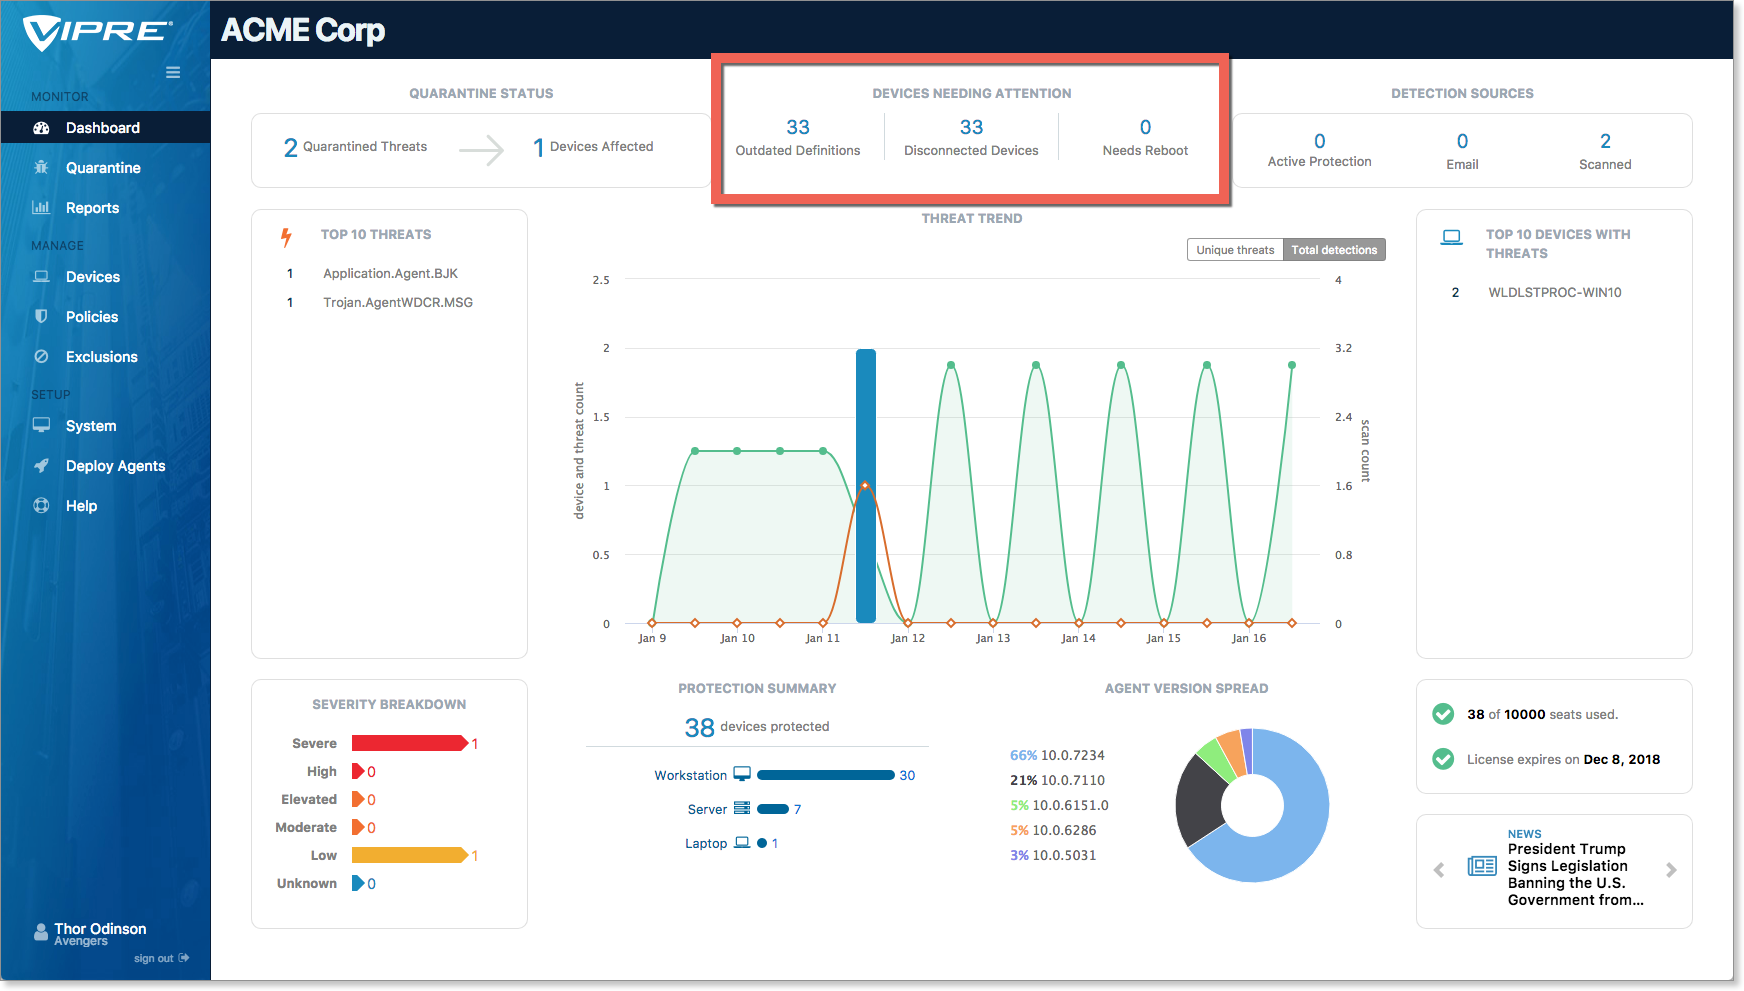
From the dashboard, check Devices Needing Attention
- Select the devices number to review details for any devices that are highlighted here.
Additional information
- Refer to Related Articles for more information on viewing device details and what to look for.
Verify your policies and exclusions
Check the details of each policy and associated exclusions
- Check to ensure the settings match up against your pre-migration settings
- You don't need to review every policy, but might want to check a few of your key policies to confirm the correct devices are listed
To view your policies, select Policies > Policy Name > View
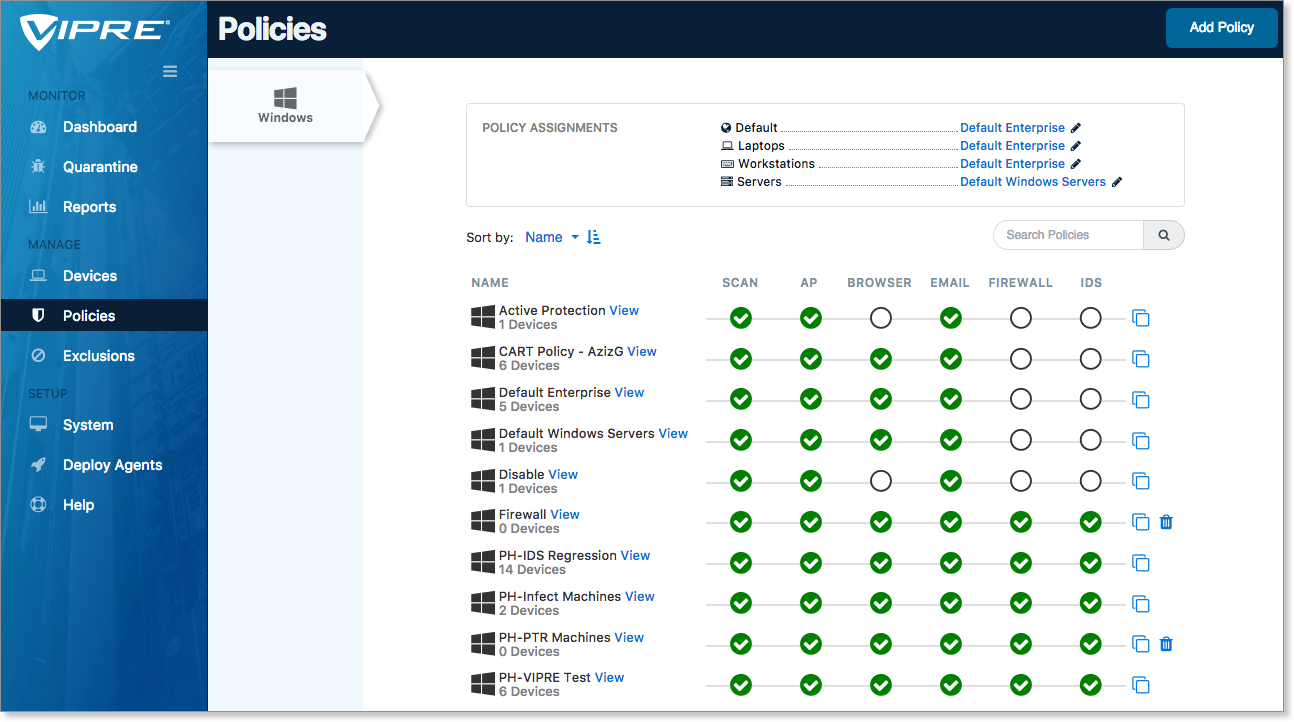
Confirm your default policy assignments
- Check to ensure that the correct policies are set as the default for your defined device types: Policies > Policy Assignments.
- In the Policy Assignments section, select the pencil next to a Policy Name to choose a different default policy for the device type listed. New devices will use the Default policy if they are not detected as one of the other device types.
.png)
Additional information
Refer to Related Articles learn more about policies and choosing policy defaults.
Check each of your custom exclusions
Exclusions are no longer tied to policies; you can view exclusions from within a policy, or look at the exclusions on their own.
- To view exclusions assigned to a policy, select Policies > Policy Name > Associated Exclusions
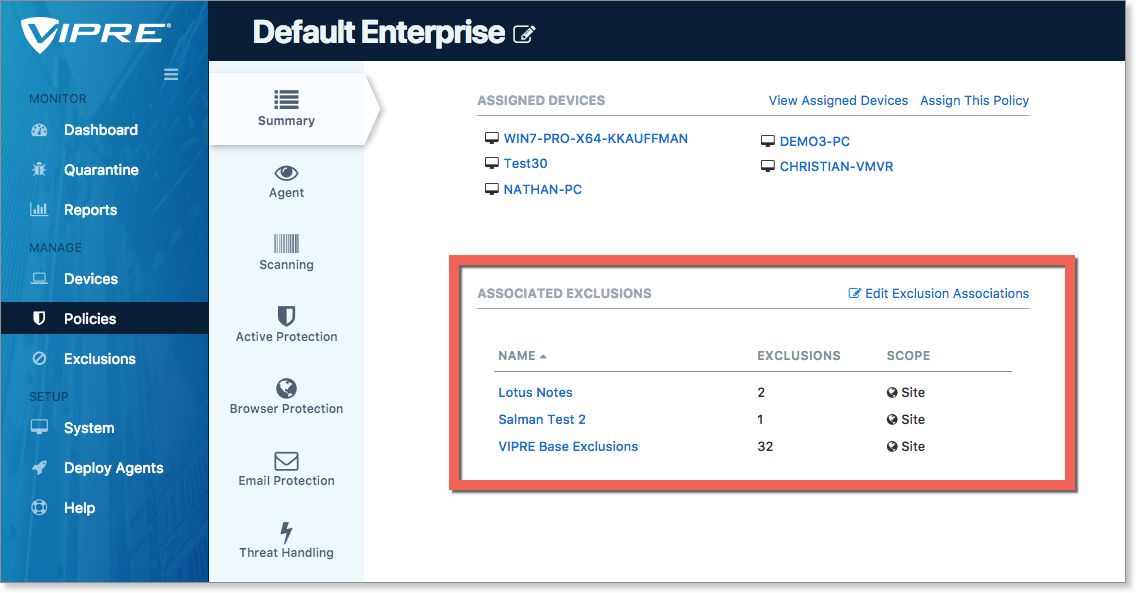
- To view exclusion settings by themselves, select Exclusions > Custom > Exclusion name
Refer to Related Articles to learn more about exclusions.
Check your System Settings
If you have not already done so, review your System settings
- Notifications - Set email alerts for specific detections, or schedule health and threat digests
- Users - Add/Remove/Edit your VIPRE Cloud users
- Settings - Set your timezone, length of time before devices are considered disconnected or outdated, or how agent updates are handled
- Site Name - Change the name of your VIPRE Cloud site
Additional information
- More information on Notifications is in Add an immediate notification for threat found
- More information on Users is in Add and edit users
- The System Settings options are in Overview of system settings
- The agent update process can be adjusted on a few levels. Review Manage agent software updates for more information
- Changing your site name is detailed in Change your site name
Create additional Endpoint Cloud logins
If you have not already, now is a good time to create user accounts for others on your team.
- To create additional user accounts - see Add and edit users.
Test agent functionality with device actions
Now that you have your devices connected to Endpoint Cloud, you may wish to test VIPRE functionality. A quick way to perform multiple actions on your deployed devices is through the Devices screen.
- Navigate to VIPRE Cloud > Devices
- Select some or all of your devices
- In the top-right, choose an action from the Actions menu
- Monitor for completion via the Devices screen or the Dashboard
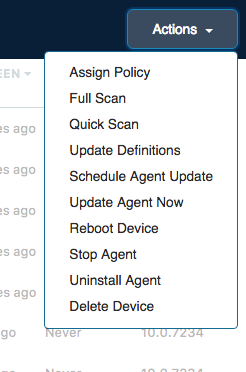
The action menu is one of Endpoint Cloud's more powerful features; you can send commands to many or all devices in just a few clicks.
Verify your custom software
Review the software running on your devices that you identified in the Take inventory of software step. Test as needed.
What Next?
If you're new to Endpoint Cloud, we recommend browsing the Basics guides to become more familiar with the product.