
A policy is a group of settings that controls the behavior of the VIPRE agent on each device. All agent options are controlled through policies, including:
- scheduled scan times
- amount of user interaction on the agent
- whether to remove incompatible software during agent install
- device control and more
Policies are often created with types of devices in mind, such as servers, laptops, and desktops. You might also create policies that collect more specific groups of devices in your infrastructure, like "Windows 10 desktops" or "Sales MacBooks."

A policy is tailored to the group of devices that it protects.
Every agent must be assigned a policy. You can define any number of policies for your site to meet your specific needs.
Exploring Policies
The Policies tab (Manage > Policies on the left side menu) in VIPRE Cloud is your spot for managing policies. Select Windows or Mac to see which policies relate to those operating systems.
Once you've chosen and selected a policy to review, under Summary, you will see a list of all your policies along with default policy assignments, plus a quick summary of which protection features are enabled for any given policy. From here, you can drill down to see detailed policy settings as well as create or clone policies to create new, custom policies.
Policies available at first launch
VIPRE Cloud initially provides two predefined policies:
- Default Enterprise - ideal for most workstations and laptops - this is also the default policy to which all but servers will be assigned
- Default Servers - settings that consider specific server hardware/software needs
These policies are based on the most common settings needed for these types of devices. They're also a good jumping off point for creating your own custom policies.
Policy Defaults
When agents are deployed, you get to choose whether a specific policy is pre-assigned to the agents you are deploying, or whether the agent will adopt the default policy. If you allow the default policy, then the agent will report back the type of system it was deployed to (server, laptop, desktop), and the device will be automatically placed into the appropriate policy (as defined by the default policy settings on the Summary tab).
If you drill down on a specific policy, you can see all the devices associated with that policy and easily assign additional devices to that policy. When you assign a new policy to a device, the agent will pick up the new policy the next time it checks in with VIPRE Cloud.
You can also edit specific policy settings to define the behavior you want for the agent. When working with policies, you will see that related settings are grouped together for easier management.
Settings Groups
The list below shows the group names and sub-groups, along with a brief description of their purpose. Depending on which platform the policy is for (Windows or Mac) not all groups or settings will be available.
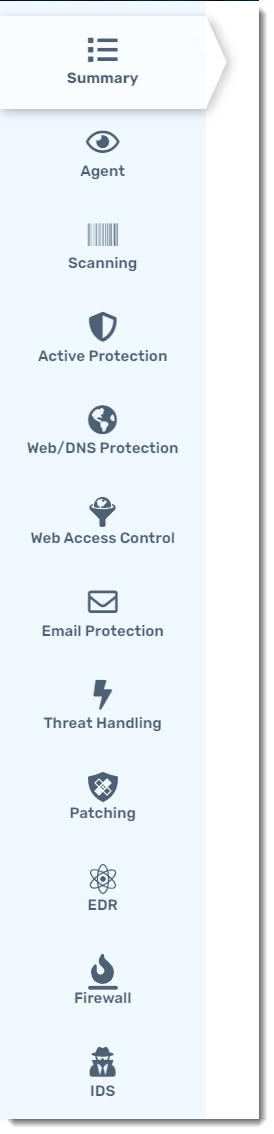
- Agent
- User Interface - show agent icon on taskbar or menu bar; allow/disallow user to perform manual scans; cancel, pause and resume scans; customize reboot message; enable automatic reboot
- Permissions - allow/disallow user to open agent UI; manage quarantine, exclusions, scan schedules, scan history, or remediate manual scans
- Operating System - disable Windows Defender, integrate with Windows Security Center, NT event logging; show agent in installed programs; wake from sleep for scheduled scans, laptop power save mode
- Uninstall Protection - when enabled, requires an autogenerated password to uninstall the VIPRE Agent
- Data Retention - auto-delete quarantine and scan history data; specify length of time for data retention when auto-delete is enabled
- Updates & Communications - control frequency of definitions and agent software updates, enable use of beta agents when available
- Incompatible Software - specify if incompatible software is automatically removed when agent is installed; set reboot behavior when removing incompatible software
- Tamper Protection - enabled by default; prevents modifications of your computer's local product folders, registry keys, and virtual memory where the VIPRE Agent resides
- Device Control - limits how users may transmit sensitive information to third-party devices, as well as protecting the endpoint from potential third-party threats
- Device Control requires VIPRE Cloud Agent 13.2 or higher
- Scanning
- General - on demand (user right-click option), USB drives on insert, randomize scheduled scan times, handling of missed scans
- Threat Handling - action to take when a possible threat is found; e.g. disinfect, delete, or quarantine
- Quick Scan - set day and time, locations, and item types (e.g., cookies, rootkits, processes)
- Full Scan - set day and time, locations, and item types (e.g., cookies, rootkits, processes)
- Active Protection
- Active Protection - enable/disable active protection and set level to high-risk extensions only, execution only, or all touched files
- Interaction - control amount of user interaction allowed with Active Protection
- HIPS - enable/disable the Host Intrusion Prevention System and control how code injection is handled (e.g., allow, block, prompt)
- AMSI - enable malicious script blocking with Microsoft AMSI protection
- Exploit Protection - enable detection and blocking of program exploitation attempts
- Web/DNS Protection
- DNS Protection - enable/disable DNS traffic filtering
- Web Protection - enable/disable Malicious URL Blocking for HTTP or HTTPS traffic, specify ports to filter
- Logging & Interaction - enable logging, or allow the user to configure
- Web Access Control
- Web Access Control - enable/disable web access control
- Access Control Level - select a level to block specific website categories
- Scheduling - have Web Access Control run 24 hours a day or set a specific schedule
- Email Protection
- General - enable/disable email and anti-phishing
- Clients - enable/disable protection for Microsoft Outlook or other email clients
- Interaction - allow user to enable/disable
- Threat Handling
- Remediation - by item type, specify whether to allow, report only, quarantine, or delete items that are detected as possible threats
- Patching
- Application Scanning - enable/disable application scans to look for security vulnerabilities
- Application Updates - enable/disable automatic application updates based on a schedule
- EDR
- Extended Investigation - enable/disable features to support extended investigations, including event and alert collection, correlation, and incident creation and management
- Remote Shell - enable/disable remote shell access; you can also limit the set of available commands to only low-risk commands
- Ransomware Protection - enable ransomware protection helps VIPRE block ransomware more effectively and automatically roll back any changes made by the ransomware; when disabled, VIPRE only blocks encrypted actions; however, when enabled, VIPRE stops further encryption and restores any previously encrypted files
- Firewall
- General - enable firewall
- Logging - enable/disable logging for events or port scans
- Application Rule Default - rules to apply for applications
- Advanced Rules - rules to set communication direction, application, protocol, ports
- IDS
- General - enable intrusion detection system
- Intrusion Actions - set response based on priority of detection
- IDS Rules - view or disable rules