
Congratulations on your purchase of VIPRE Endpoint Detection & Response!
Our guided setup will help you get started with setting up VIPRE Endpoint Detection & Response to provide the best protection for your organization. So, let's get started!
Step 1 - Protect your Devices
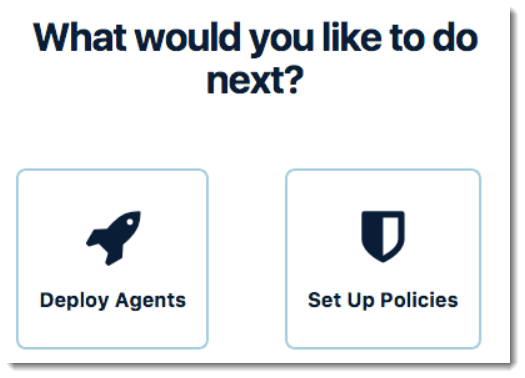
First things first: you are not yet protected! When you first use VIPRE EDR, you can choose to first deploy agents using default policies, or you can set up customized policies for use by your agents.
The first time you log in to VIPRE Cloud, you are asked if you'd like to Deploy Agents or Set Up Policies.
Important
Until you have deployed agents to your devices, VIPRE is not protecting them. You must deploy an agent to a device to protect it. At this point, VIPRE is waiting on your decision, and you need to take further action before your devices are protected and managed by VIPRE.
About Agents and Policies
A brief overview of VIPRE agents and the concept of policies.
What is an agent? An agent is the VIPRE software that runs on your endpoint devices.
What is a policy? A policy is a group of settings that controls the behavior of the agent on each device.
Deploy Agents or Set up Policies?
This criteria will help you determine which route to go first.
| Deploy Agents First | Set up Policies First |
|---|---|
| If you want to protect your devices as quickly as possible with our recommended/default settings, this is the best option. | If you prefer to review and customize policies before protecting your devices, this is the best option. |
|
Reasons to choose Deploy Agents first:
|
Reasons to choose Set Up Policies first:
|
|
Next Step If you decide to deploy agents using our default policies, refer to Related Articles for details on deploying agents within EDR. |
Next Step If you decide to set up custom policies before deploying agents, refer to Related Articles for details on using policies within EDR. |
Can I bring back the "first run" screen?
Yes. Copy and paste the following URL, replacing sitename with the name of your site:
https://sitename.myvipre.com/home/first
Click the arrow to return to the previous step.
VIPRE EDR supports two user roles: analyst and admin.
- Analyst - limited to deploy agents, investigate threats, manage quarantine. Includes ability to view policies and exclusions, but cannot modify
- Admin - full access to the configuration of the product, including policy creation and editing, exception definitions, and system settings. Includes all permissions of the analyst role
Create a User
As an admin, you may create users with either admin or analyst roles. You will need each user's first/last name and email address. A phone number is optional.
- Click System > Users > Add User
- Enter the user details
- Click Add User
New users will receive a welcome email from VIPRE with their account confirmation, support details, a Log In button and site link. You will need to separately send each user their password or they can click reset password on the login page to change it.
For details on editing an existing user and other ‘system’ features, refer to Related Articles.
EDR Dashboard
The VIPRE Endpoint Detection & Response (EDR) dashboard provides an overview of the data and information needed to know what actions to take to keep your organization safe.
Exploring the Dashboard
When you first log in to VIPRE EDR, the first screen you see is the Dashboard. The Dashboard is a one-stop shop to get a quick picture of the overall security posture and health of your environment. Each highly consumable section provides insight into a particular area of VIPRE's protection.
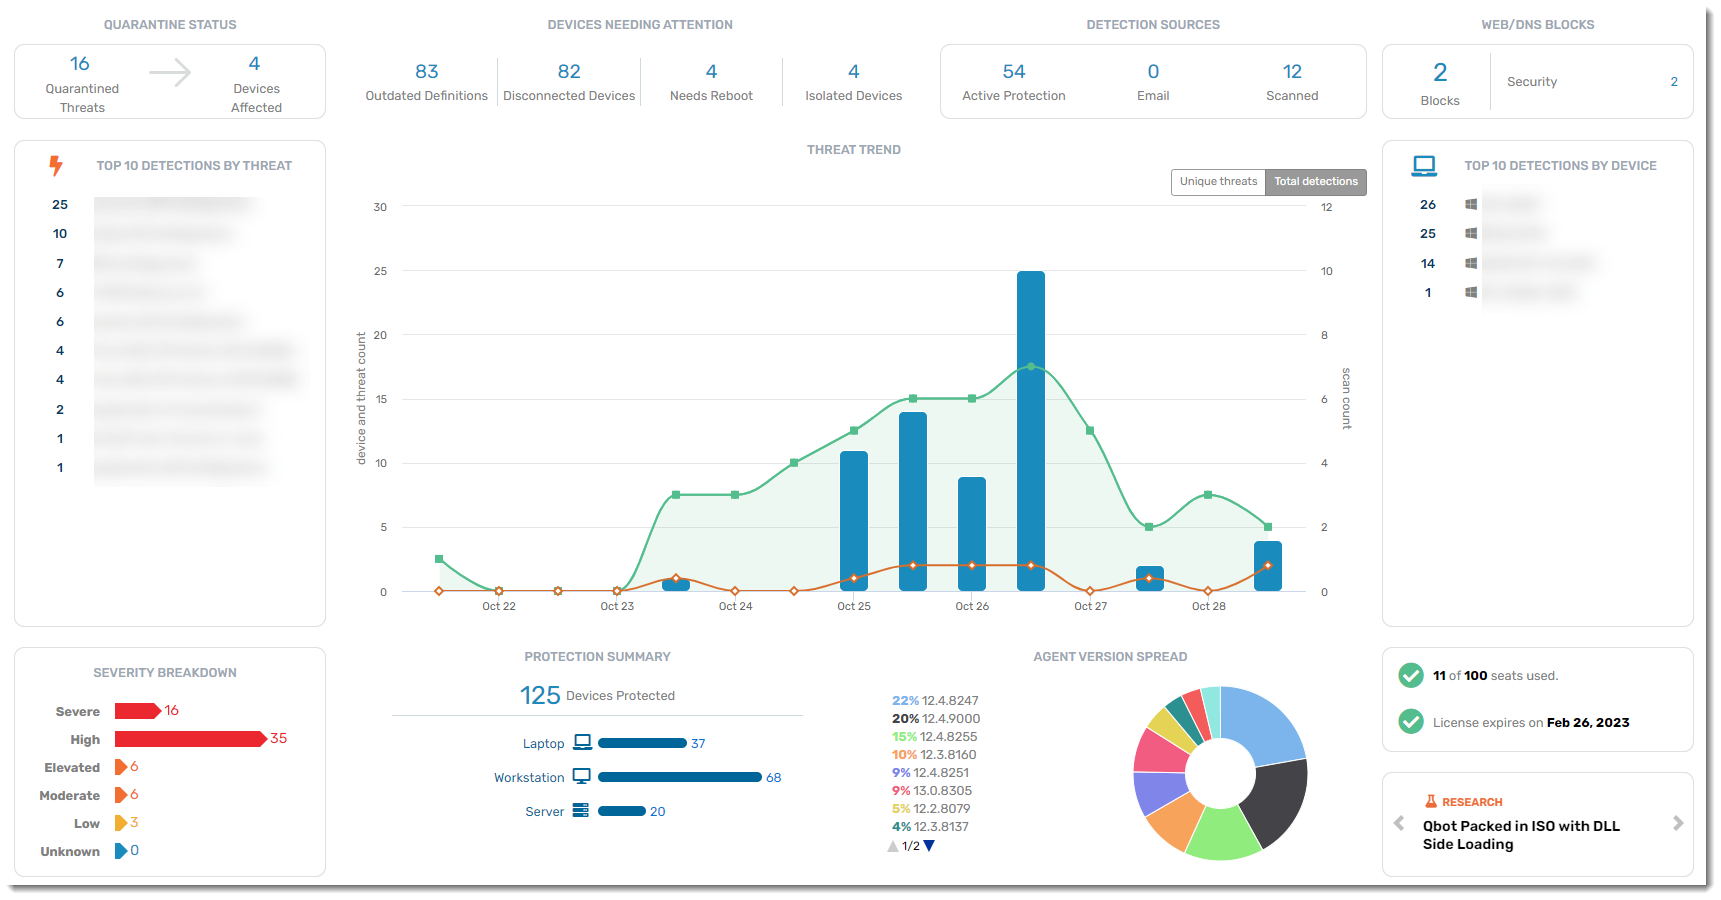
Quarantine Status
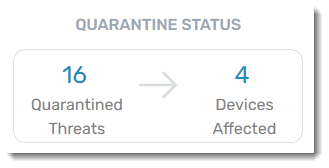
A real-time summary of the number of threats currently in quarantine and how many different devices those threats were found on. Drill down here to delete those threats or un-quarantine any file that is verified as accidentally quarantined (a false positive). The new quarantine counts will be immediately reflected on the dashboard.
Devices Needing Attention

A summary of devices that may be having trouble because they:
- aren't getting signature updates; outdated definitions indicate potential security risk
- aren't communicating with VIPRE Cloud (unresponsive, shut down, etc.)
- need to be rebooted
- are isolated by a site administrator, preventing them from sending or receiving any traffic
You will want to investigate these devices to ensure that all of your systems stay protected. As each device issue is resolved, the counts will be updated on the dashboard.
Detection Sources
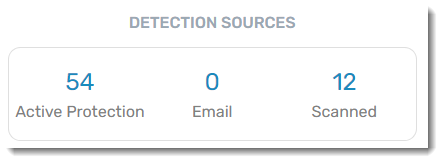
A historical summary of discovered threats and which VIPRE engine detected them
- Active Protection - the Active Protection engine, which includes on-access scanning and process behavior monitoring
- Email - the email engine that scans email contents and attachments, looking for spam, phishing, and malware patterns
- Scanned - the scanning engine that handles ad hoc or scheduled scans of your file system
Web/DNS Blocks
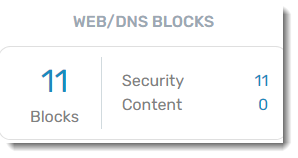
A historical summary of how many items have been blocked by Web/DNS Protection, categorized into Security blocks and Content blocks. Clicking on any of the numbers in this widget brings you to the Web Activity Summary Report. Refer to Related Articles for details about reports in EDR.
Top 10 Detections by Threat
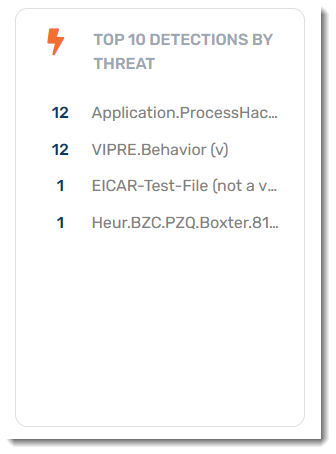
A historical summary of the top 10 active threats. Use this to ensure that no particular threat is infecting your environment. An excessive count is an indication of a widespread issue. Drill down into a threat for more details on the threat itself, the devices it has impacted, and how it was detected.
Threat Trend
A historical summary of trending threats within your organization. There are two views on this graph - unique threats and total detections - providing device, threat, and scan counts by date.
- Blue = Threats
- Green = Scans
- Orange = Devices with threats
Hovering your mouse over any of the data points provide specifics for that day. Clicking on a blue bar or orange line on a specific date takes you to the Threat Detection Report. Clicking on a green line on a specific date takes you to the Scan Report.
Top 10 Detections by Device
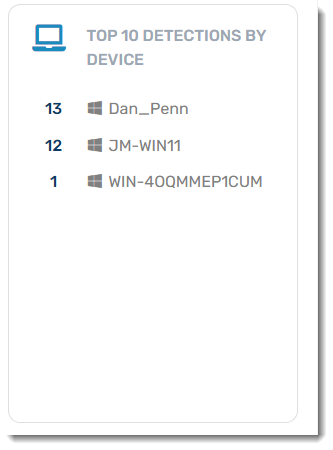
A historical summary of the top 10 devices with threats. Use this to identify which devices may be particularly susceptible to threats and that may be a particular risk to your environment.
Severity Breakdown
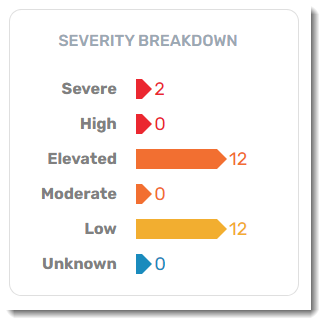
A historical summary breaking down of each threat's severity level. Clicking on each severity type will bring you to the Threat Detection Report.
Protection Summary
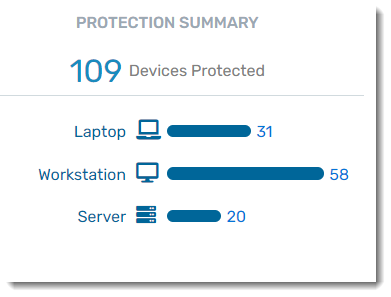
View a breakdown of the number of devices in each category that VIPRE is currently protecting. Clicking on a device type here will bring you to the Devices tab, sorted by the device type you clicked on.
Agent Version Spread
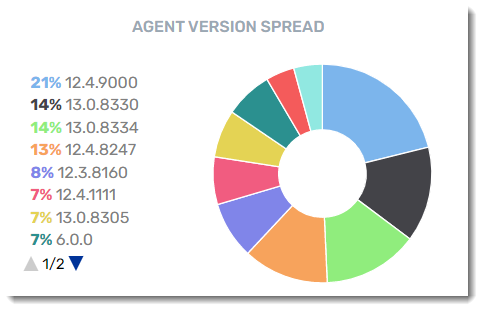
View a summary of the agent software versions that are currently deployed or available. We are continuously improving our engine detection technology, so it is always a good idea to keep your agents up to date!
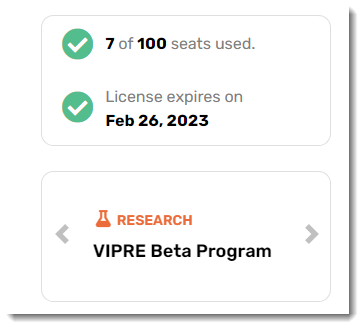
Finally, we're at the bottom of the dashboard. Here you can find the number of seats you've already consumed versus the number of seats in your package. Research will link you directly to our VIPRE Labs blog located on at https://labs.vipre.com.
Click the arrow to return to the previous step.
VIPRE can send immediate email notifications to alert you when a threat is found. You can specify the threat levels, detection types, and devices for which you want alerts.
There are four different types of notifications:
- Threat Detected
- Incident Detected
- Health Digest
- Threat Digest
To add a new notification:
- Navigate to System > Notifications and click the Add Notification button in the top-left corner
- Name your notification
- Select the type of notification with a checkmark
- Select one or more sources
- AP (Active Protection)
- Scan
- Slide the severity bar to choose:
- Unknown severity and everything above it
- Low severity and everything above it
- Moderate severity and everything above it
- Elevated severity and everything above it
- High severity and everything above it
- Severe severity
- Add email addresses of those you want to receive the notifications; emails should be separated by commas when adding more than one
- If desired, you can edit the subject of the email notification
- Set the scope to determine if the notifications should be across the whole site or only for a specific policy
- Select Preview to see a draft of what the email will look like
- Click Done to return to the previous screen and make changes if desired
- When ready, click Add Notification
You've created a new notification.
VIPRE Recommends
At a minimum, we recommend you set up alert notifications for threat categories Elevated through Severe. Most threats will be immediately blocked and/or quarantined, but it's a good idea to stay on top of new threats as they come in to ensure that quarantined files don't start to pile up and side effects don't cause system issues.
Click the arrow to return to the previous step.
VIPRE provides a couple of handy ways to alert you to newly-discovered threats. We've already gone over the EDR Dashboard and creating threat notification emails. (To review them again, click the arrow to return to the previous step.)
The email alert channel is a great way to stay on top of threats as they happen, and reduces the need to spend time proactively working with the console. Email alerts however allow you to instantly drill down on relevant data, which leads you right back into the console where you can respond to and remediate the discovered threats.
Our discussion here will focus on using the dashboard to monitor and respond to threats, whether you are brought to the dashboard by an alert or go there directly.
Monitoring Threats with the Dashboard
The first line of defense in responding to threats involves keeping a close eye on the information displayed in the VIPRE dashboard. Use the dashboard to drill down and view the appropriate level of detail when investigating or remediating quarantined threats in your environment.
Some of the most common threats include
- Email-based threats
- Network-based threats
- Device-based threats
- Email-based Threats
The most common type of malware attack is sourced from email messages. Malware authors attempt to coerce users into triggering attacks through the use of malicious attachments or suspect URLs. Attackers use these email techniques in order to gain a foothold on the endpoint system.
If VIPRE discovers a suspicious file attachment or URL in an email, it will remove and quarantine the attachment or replace the URL with a warning, thereby eliminating the risk that an inattentive user might click on the threat.
Network-based Threats
Malicious links in email or suspicious websites can trigger network-based exploits. There are also direct network exploits, such as a recent Server Message Block (SMB) exploit leveraged in the WannaCry ransomware breakout. Any over the air attack on a network device (man in the middle, Bluetooth attack, packet sniffing) is also considered a network-based threat.
VIPRE will block many types of network-based threats and prevent network traffic from entering a target device. No action is typically required in this case.
Device-based Threats
A device based attack involves the activating of malicious content on a device. This could occur through the transferring a file from a physical device, such as a USB flash drive, or from a remote file share.
File-based threats found on a device will be quarantined, and processes behaving in a malicious manner will be stopped. Quarantined threats should be reviewed regularly and action is taken to delete the threat or, in the case of a rare false positive, unquarantine the threat.
Respond to Threats
To respond to threats, be sure to monitor real-time threat data under the VIPRE dashboard or the Quarantine screen. In the Quarantine screen, you can search for threats according to their severity, category, or threat source.
In the VIPRE dashboard, be sure to watch the Quarantine Status and Devices Needing Attention widgets for indicators that something may be amiss.
To protect your environment, EDR filters suspicious threats and displays the information on the Quarantine screen. Use the Quarantine screen to perform any of the following tasks
- View threat detail
- Delete a threat
- Search for threats
- Ignore a threat
EDR - Threat Severity Levels
Detected threats are assigned a severity level which is useful for triage. The levels, which are described below, are labeled as Severe, High, Elevated, Moderate, Low, and Unknown.
| Severity Level | Description |
|---|---|
| Severe | Severe risks are typically installed without user interaction through security exploits and may allow an attacker to remotely control the infected machine. Such risks may allow the attacker to install additional malware and use the compromised machine to participate in denial of service attacks, spamming, and botnets, or to transmit sensitive data to a remote server. The malware may be cloaked and not visible to the user. These risks severely compromise the system by lowering security settings, installing 'backdoors,' infecting system files or spreading to other networked machines. A severe risk should be seriously considered for immediate removal as it may completely compromise your privacy and security by allowing an attacker to remotely control your machine, exploit it for illicit purposes, or make dangerous changes to your computer without your knowledge or consent. |
| High | High risks are typically installed without user interaction through security exploits, and can severely compromise system security. Such risks may open illicit network connections, use polymorphic tactics to self-mutate, disable security software, modify system files, and install additional malware. These risks may also collect and transmit personally identifiable information (PII) without your consent and severely degrade the performance and stability of your computer. High risk should be seriously considered for immediate removal as it may compromise your privacy and security, make dangerous changes to your computer's settings without your knowledge or consent; or severely degrade your computer's performance and stability. |
| Elevated | Elevated risks are typically installed without adequate notice and consent, and may make unwanted changes to your system, such as reconfiguring your browser's homepage and search settings. These risks may install advertising-related add-ons, including toolbars and search bars, or insert advertising-related components into the Winsock Layered Service Provider chain. These new add-ons and components may block or redirect your preferred network connections, and can negatively impact your computer's performance and stability. Elevated risks may also collect, transmit, and share potentially sensitive data without adequate notice and consent. An elevated risk should be considered for removal or remain quarantined as it may compromise your privacy and security, make unwanted changes to your computer's settings, or negatively impact your computer's performance and stability. |
| Moderate | Moderate risks are often bundled with functionally unrelated software or installed without adequate notice and consent and may display unwanted advertising on the user's desktop. Such risks may track users' online browsing habits and transmit non-personally identifying data back to a server in order to target advertising. These risks may be configured to start automatically with the operating system, use an auto-updater that the user cannot control, or install other functionally separate programs without adequate notice and consent. A moderate risk should be considered for removal or remain quarantined as it may negatively impact your privacy and security or make unwanted changes to your computer's settings. |
| Low | Low risks should not harm your machine or compromise your privacy and security unless they have been installed without your knowledge and consent. A low risk may be a program, network tool, or system utility that you knowingly and deliberately installed and that you wish to keep. Although some low-risk programs may track online habits -- as provided for in a privacy policy or End User License Agreement (EULA) -- or display advertising within the applications themselves, these programs have only vague, minimal or negligible effects on your privacy. Low risks may also be cookies, which can be used to track your online activities, though without identifying you personally. A low risk may be kept or removed at your discretion. A low risk has only vague or minimal privacy and security effects. If this is a program that you knowingly and deliberately installed, you may consider keeping it. If it is a cookie, then you may consider removing it. |
| Unknown | Unknown is assigned to threats that may not have enough intel, or metadata, to be able to determine the appropriate severity level. For those threats, rather than assign a level that may not be appropriate, VIPRE assigns them to Unknown so that Administrators or Threat Researchers know to review these as carefully as the threats reported at the higher severity levels. |
Further Investigation
Since VIPRE proactively blocks threats before targeted devices are impacted, most threat response is limited to cleaning out the quarantine and handling the occasional false positive. However, there are a few circumstances where the additional investigation might be desirable:
- In some cases, VIPRE is not able to completely clean up all files related to a specific threat, for example, if locked files are in use, etc. In this scenario, additional action may be required on the affected machine to finalize the threat clean up.
- You may discover that a particular device or user seems to be repeatedly affected by threats again and again. This could be caused by system misconfiguration, user carelessness, or some underlying, undetected problem. If you see repeated infections of a particular target system (the timeline device view is a good way to discover this), you may wish to look more deeply at the underlying causes.
Click the arrow to return to the previous step.
EDR - Devices
Throughout VIPRE EDR, device refers to your endpoints and their health; agent refers to the VIPRE software on your endpoints and the health of that software. Devices are protected by VIPRE with agent software. When first implementing VIPRE in your environment, the VIPRE agent software needs to be deployed to each of your devices in order to protect them.

View Devices
The Devices page shows you an overview of every device that has checked in with VIPRE. You can quickly scan the columns to learn many details about the behavior of your devices. For example, you can see the device name, whether it is protected, which policy is applied to it, what type of device it is, the Operating System version, agent version, etc.
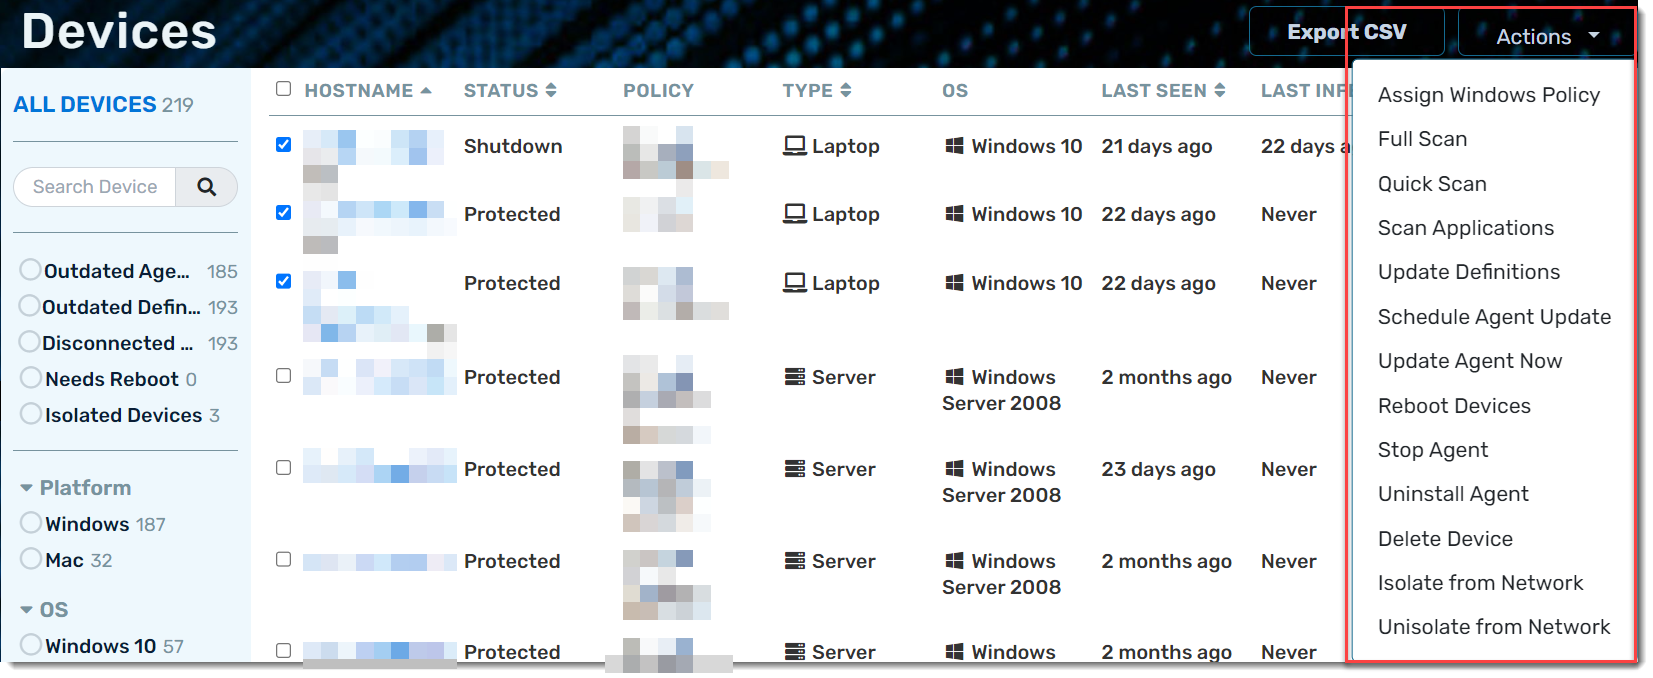
Device Actions
Selecting the checkbox next to a device, or a group of devices, will give you access to the Actions drop-down menu in the top left, which includes the following actions: Assign Windows Policy, Full Scan, Quick Scan, Scan Applications, Update Definitions, Schedule Agent Update, Update Agent Now, Reboot Devices, Stop Agent, Uninstall Agent, Delete Device, Isolate from Network, and Unisolate from Network.
Filtering Devices
Because you can potentially have hundreds (or thousands) of devices on your site, it is often necessary to filter the list to limit the visible information. You can select filters to focus your view, and very quickly find devices that need action, are outdated, are disconnected, or have some other problem.
Exploring Device Details
Once you have located a device you'd like more information on, simply click the name of the device to drill down into it. From here, you're taken to the device details, shown on the Summary tab.
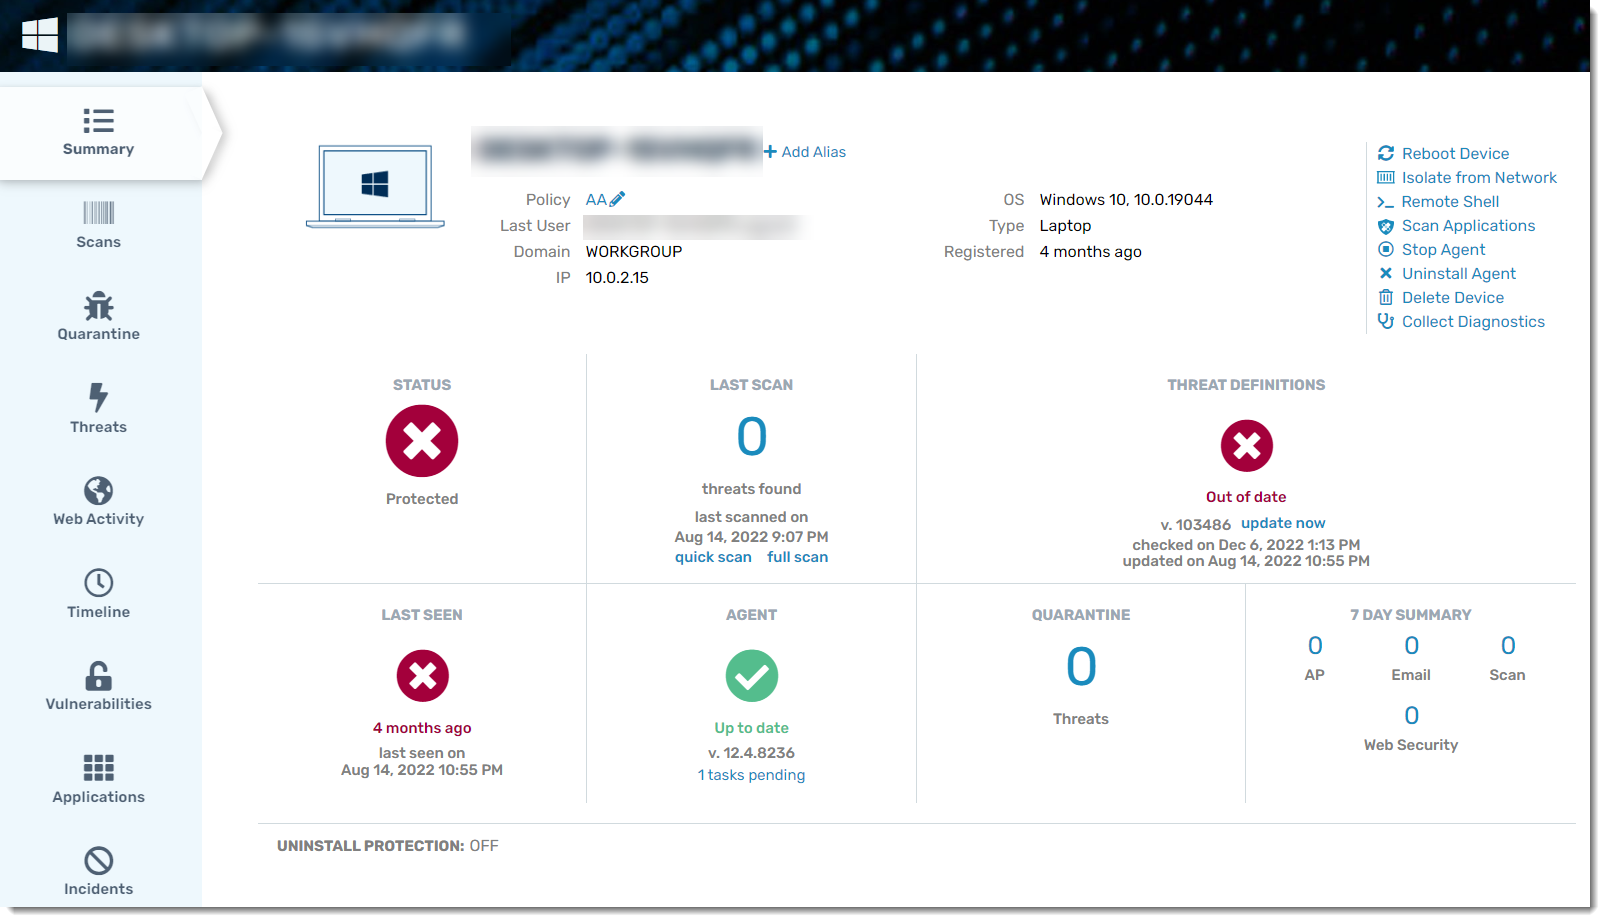
The device's summary screen is like a mini-dashboard for the selected device. The STATUS section in the top left shows an immediate all-in-one status of the device. Is it good to go, or does it need looking into?
The other sections of this screen provide further key information: Last Scan, Threat Definitions, Last Seen (the last time the device checked in), agent software version – all the top items you'll want to check when determining at a high level if a device is in performing properly.
Along the top, you have some network and admin-level items: Domain, IP address, OS. The quick-action links in the top right give you single-click common actions to perform on that device: reboot the device, isolate the device from the network, connect to the device remotely via Shell, scan applications on the device, stop the agent software, uninstall the agent software, delete the device and collect diagnostic information.
The tabs on the left show even more information for each category: Latest scan details, items in quarantine on this device, threats found, and a super-useful vertical timeline that shows the history of the device and more.
From this screen, you can also assign an alias to the device. Refer to Related Articles for more information on using aliases.
Click the arrow to return to the previous step.
EDR - Policies
A policy is a group of settings that controls the behavior of the VIPRE agent on each device. All agent options are controlled through policies, including:
- scheduled scan times
- amount of user interaction on the agent
- whether to remove incompatible software during agent install
- device control and more
Policies are often created with types of devices in mind, such as servers, laptops, and desktops. You might also create policies that collect more specific groups of devices in your infrastructure, like "Windows 10 desktops" or "Sales MacBooks."

A policy is tailored to the group of devices that it protects.
Every agent must be assigned a policy. You can define any number of policies for your site to meet your specific needs.
Exploring Policies
The Policies tab (Manage > Policies on the left side menu) in VIPRE Cloud is your spot for managing policies. Select Windows or Mac to see which policies relate to those operating systems.
Once you've chosen and selected a policy to review, under Summary, you will see a list of all your policies along with default policy assignments, plus a quick summary of which protection features are enabled for any given policy. From here, you can drill down to see detailed policy settings as well as create or clone policies to create new, custom policies.
Policies available at first launch
VIPRE Cloud initially provides two predefined policies:
- Default Enterprise - ideal for most workstations and laptops - this is also the default policy to which all but servers will be assigned
- Default Servers - settings that consider specific server hardware/software needs
These policies are based on the most common settings needed for these types of devices. They're also a good jumping off point for creating your own custom policies.
Policy Defaults
When agents are deployed, you get to choose whether a specific policy is pre-assigned to the agents you are deploying, or whether the agent will adopt the default policy. If you allow the default policy, then the agent will report back the type of system it was deployed to (server, laptop, desktop), and the device will be automatically placed into the appropriate policy (as defined by the default policy settings on the Summary tab).
If you drill down on a specific policy, you can see all the devices associated with that policy and easily assign additional devices to that policy. When you assign a new policy to a device, the agent will pick up the new policy the next time it checks in with VIPRE Cloud.
You can also edit specific policy settings to define the behavior you want for the agent. When working with policies, you will see that related settings are grouped together for easier management.
Settings Groups
The list below shows the group names and sub-groups, along with a brief description of their purpose. Depending on which platform the policy is for (Windows or Mac) not all groups or settings will be available.
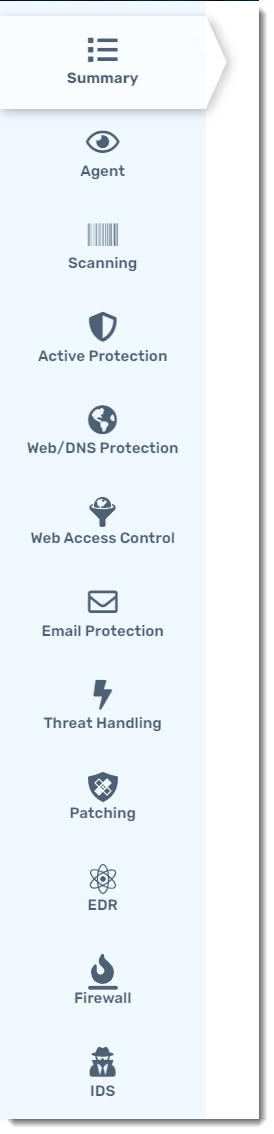
- Agent
- User Interface - show agent icon on taskbar or menu bar; allow/disallow user to perform manual scans; cancel, pause and resume scans; customize reboot message; enable automatic reboot
- Permissions - allow/disallow user to open agent UI; manage quarantine, exclusions, scan schedules, scan history, or remediate manual scans
- Operating System - disable Windows Defender, integrate with Windows Security Center, NT event logging; show agent in installed programs; wake from sleep for scheduled scans, laptop power save mode
- Uninstall Protection - when enabled, requires an autogenerated password to uninstall the VIPRE Agent
- Data Retention - auto-delete quarantine and scan history data; specify length of time for data retention when auto-delete is enabled
- Updates & Communications - control frequency of definitions and agent software updates, enable use of beta agents when available
- Incompatible Software - specify if incompatible software is automatically removed when agent is installed; set reboot behavior when removing incompatible software
- Tamper Protection - enabled by default; prevents modifications of your computer's local product folders, registry keys, and virtual memory where the VIPRE Agent resides
- Device Control - limits how users may transmit sensitive information to third-party devices, as well as protecting the endpoint from potential third-party threats
- Device Control requires VIPRE Cloud Agent 13.2 or higher
- Scanning
- General - on demand (user right-click option), USB drives on insert, randomize scheduled scan times, handling of missed scans
- Threat Handling - action to take when a possible threat is found; e.g. disinfect, delete, or quarantine
- Quick Scan - set day and time, locations, and item types (e.g., cookies, rootkits, processes)
- Full Scan - set day and time, locations, and item types (e.g., cookies, rootkits, processes)
- Active Protection
- Active Protection - enable/disable active protection and set level to high-risk extensions only, execution only, or all touched files
- Interaction - control amount of user interaction allowed with Active Protection
- HIPS - enable/disable the Host Intrusion Prevention System and control how code injection is handled (e.g., allow, block, prompt)
- AMSI - enable malicious script blocking with Microsoft AMSI protection
- Exploit Protection - enable detection and blocking of program exploitation attempts
- Web/DNS Protection
- DNS Protection - enable/disable DNS traffic filtering
- Web Protection - enable/disable Malicious URL Blocking for HTTP or HTTPS traffic, specify ports to filter
- Logging & Interaction - enable logging, or allow the user to configure
- Web Access Control
- Web Access Control - enable/disable web access control
- Access Control Level - select a level to block specific website categories
- Scheduling - have Web Access Control run 24 hours a day or set a specific schedule
- Email Protection
- General - enable/disable email and anti-phishing
- Clients - enable/disable protection for Microsoft Outlook or other email clients
- Interaction - allow user to enable/disable
- Threat Handling
- Remediation - by item type, specify whether to allow, report only, quarantine, or delete items that are detected as possible threats
- Patching
- Application Scanning - enable/disable application scans to look for security vulnerabilities
- Application Updates - enable/disable automatic application updates based on a schedule
- EDR
- Extended Investigation - enable/disable features to support extended investigations, including event and alert collection, correlation, and incident creation and management
- Remote Shell - enable/disable remote shell access; you can also limit the set of available commands to only low-risk commands
- Ransomware Protection - enable ransomware protection helps VIPRE block ransomware more effectively and automatically roll back any changes made by the ransomware; when disabled, VIPRE only blocks encrypted actions; however, when enabled, VIPRE stops further encryption and restores any previously encrypted files
- Firewall
- General - enable firewall
- Logging - enable/disable logging for events or port scans
- Application Rule Default - rules to apply for applications
- Advanced Rules - rules to set communication direction, application, protocol, ports
- IDS
- General - enable intrusion detection system
- Intrusion Actions - set response based on priority of detection
- IDS Rules - view or disable rules
Click the arrow to return to the previous step.
EDR - Exclusions
Exclusions are lists of items such as files, domains, and processes that VIPRE should ignore; in essence, telling VIPRE what not to scan.
Certain types of software can be impacted by antivirus programs. Some software may experience strange behavior. For example, processes may be blocked by the antivirus programs based on behavior traits exhibited by the software; file lock contention may occur during scans; and so on. This is especially common with certain categories of software such as server software, databases, data backup, key loggers, and more that either require exclusive access to specific files or that use files that, although benign, contain patterns that antivirus software sees as suspicious.
How Exclusions Work
Exclusions are communicated from VIPRE to the agents as part of the policy. As the agents protect your devices, the exclusions are applied.
VIPRE provides an initial set of exclusions that is applied to all devices for resources that we know to be potential issues. Our own virus definition files, for example, would lead VIPRE to believe it had found malware if it were not excluded.
Administrators can create custom exclusions to accommodate the specific needs of their organization. Exclusions are defined in an exclusion list. That list is then associated to one or more policies (scope=policy). Alternatively, a list may be associated to all devices (scope=site).
Exclusion lists provide the flexibility to define exclusions once, and apply them to as many policies as required.

What to Exclude
Knowing what needs to be excluded from antivirus is not always intuitive. Sometimes VIPRE will tell you it blocked a process or quarantined a file that you know to be benign; in this case you can simply add that program or file to the exclusion list. In other cases, however, software may not work correctly for non-obvious reasons.
When first deploying, consider the following
- test - deploy to a group of test devices for your environment
- monitor - perform normal activity on the test systems to determine if VIPRE blocks or impacts application behavior - you may need to disable VIPRE to determine if it is the cause of any observed odd behavior
- research - look for vendor recommendations for third-party software used in your organization. Some vendors maintain a specific list of resources to exclude for antivirus programs. For example, Microsoft maintains a Microsoft Anti-Virus Exclusion List for their software.
Predefined and Custom Exclusions
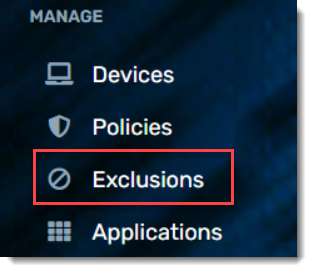
Exclusions are viewed and managed from the Exclusions page. Custom lists can be created for Windows and Mac policies. For Windows based policies, a VIPRE Known list is provided.
- VIPRE Known - read-only exclusions for Windows OS that come with VIPRE, curated by the VIPRE Team. VIPRE manages both the default VIPRE Base Exclusions and VIPRE Server Exclusions lists. We push out additions to these exclusions that work across our entire customer base.
- Custom - any lists of exclusions that you create
Your instance of VIPRE EDR comes with VIPRE Base Exclusions, which applies to all of your Windows devices. Additionally, VIPRE Server Exclusions is automatically assigned to Windows Servers (through the Windows Servers policy, one of the default policies included with VIPRE Cloud).
As suggested in this article, the need to create custom exclusions is common practice when using antivirus software. When adding exclusions, be sure to follow your vendors' specific recommendations. Note however that excluding resources at a higher level than what is recommended can be a security exposure. For example, do not exclude items at the directory, or folder, level when the vendor lists specific files in the folder.
Adding Custom Exclusions
- Click Add Exclusion List in the top right corner
- Name your custom exclusion list and click Next
Once you're in the custom exclusion list, now you can create exclusions.
- Click +Add Exclusion at the top-right corner of the screen
- Select one of five exclusion types:
- File: Choose a Subtype (Filename, Filepath, or Folder), and add Value (see example in text box)
- Domain: Add Value (see example in text box)
- Process: Add Value (see example in text box)
- Hash: Add Value (see example in text box)
-
Device: Choose to exclude device by Type or Specific Type
- If you've chosen Type:
- Select the desired category (CD/DVD or Removable drives)
- Select the desired Bus (Any, ATA IDE, Firewire, SCSI, USB, PCMCIA)
- If you've chosen Specific Type:
- Select the desired category (CD/DVD or Removable drives)
- Add value to Hardware ID (see example in text box)
- Add value to Serial ID (see example in text box)
- If you've chosen Type:
Hardware ID and Serial ID details can be copied from the Device Control Report and pasted here to add an exclusion for a specific device. This is helpful when you've set a broad Device Control policy to block all removable drives but still require at least one particular endpoint to access USB Flash drives.
- Click Add
Manage Exclusions:
Within the custom exclusion list, you can select the exclusion category type from the side navigation menu. Find the desired exclusion and select the Modify or Delete icons.
You can also the scope of your exclusion list by selecting Scope > Site or Policy.

Click the arrow to return to the previous step.
EDR - Reports
VIPRE Endpoint Detection & Response provides attractive, easy to understand reporting to give you quick access to health and security summaries of what's going on in your environment. Reports can be seen within the console or delivered to your inbox via email.
Interactive Reports
Interactive Reports are also great summaries of important information about the overall operational and security status of your environment. Under the Monitor > Reports tab, you can find reports that summarize your threat posture, which devices have registered with VIPRE Cloud, your current VIPRE Cloud subscription status, and more.
Reports are a great way to get a quick visual representation of what's going on—similar to the dashboard, but with a table of additional detail.
| Report | Description |
|---|---|
| Threat Detection Report | A historical view of threats that have been detected by VIPRE; filterable by severity, action taken, policy, and more; click on the name of the threat for additional details, including all affected devices |
| Threat Summary Report |
A summary dashboard for all threats with widgets for the following categories:
|
| Device Registration Report | A historical list of devices with VIPRE Agents; filterable by platform, device type, operating system, or policy |
| Scan Report | A historical list of quick scans, full scans, and custom scans, including date/time and devices scanned |
| Web Activity Summary Report |
A summary dashboard for all web activity with widgets for the following categories:
|
| Web Access Control Report | When Web Access Control is enabled within your policies, this shows a historical view of which categories were blocked (e.g., ads, hate, dating, gambling, etc.) and which devices are most often attempting to access these sites causing them to be blocked |
| License Summary Report | Shows a real-time and historical view of how many seats you have licensed, how many are currently active/used, when you purchased EDR, and when your license expires |
| Applications Update Report | Part of Patch Management; a real-time and historical view of software update details including the device, application, current version, and status |
| Shell History Report | A historical view of who accessed which devices, when they accessed them, and what they did via Remote Shell |
| Audit Report | Details all user actions, including when a user logs in, does a device scan, creates a notification, updates a policy, changes a user account, and more |
| Device Control Report | A real-time and historical view of device-related events including the date and time of the event, the type of drive, the bus type that the drive is plugged into, the device it's plugged into, the policy it was accessed with, and whether it was denied/blocked, etc. Clicking the Device link allows you to drill down further to see all Device Control events for a specific device. |
Click the arrow to return to the previous step.
EDR - Web Access Control
Web Access Control allows you to define policies around which types of websites the people in your organization are, or are not, allowed to visit.
What Web Access Control Does
Built on top of VIPRE's existing endpoint filtering of malicious websites, Web Access Control is a simple solution that gives organizations an easy way to prevent end-users from visiting websites that may be inappropriate or distracting in the workplace. The new add-on:
- Intercepts DNS requests and classifies attempts to visit websites
- Intercepts HTTP and HTTPS (via browser extension) requests if DNS capability is turned off
- Blocks access to prohibited content according to policies defined by IT administrators
- Supports different policies for groups of devices/users, and can apply the policy only during specified hours (e.g., during the workday)
- Is implemented using VIPRE's endpoint agent, preventing circumvention by using alternate or hard-coded DNS providers
- Does not replace any existing DNS infrastructure or settings; it intercepts and analyzes DNS queries while redirecting undesired website visits to a sinkhole address
- Clearly warns the user about why they can't visit the requested website
- Enlists easy-to-use whitelisting capabilities to handle exceptions where there is a business need
Access Control Levels
VIPRE Web Access Control provides three pre-defined levels of access control to block access to the most commonly misused website types but also allows for more personalized customization if needed.
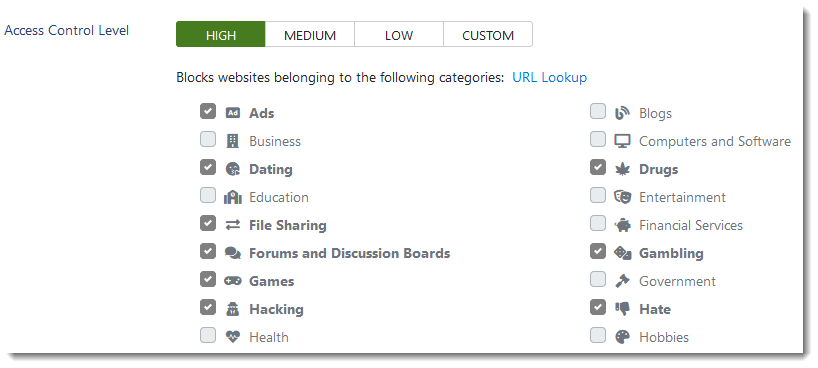
URL Lookup
You can also lookup specific websites to determine which category they belong to by clicking URL Lookup. Simply type in the web address and press Enter on your keyboard. Web Access Control tells you how many categories the website is listed in and what those categories are by highlighting them in yellow. If desired, you can also add the website to your exclusions list from here by clicking +Add to Exclusions.
Why Web Access Control is Necessary
There are many reasons why your organization might need Web Access Control. Some of the biggest examples we've come across are:
- Duty of Care: A requirement that a person act toward others and the public with the watchfulness, attention, caution, and prudence that a reasonable person in the circumstances would use. Examples of this include schools with minors using computers and companies that work closely with the public and are concerned about brand reputation.
- Productivity: Examples of this include retail, manufacturing, call centers, and other fields with employees expected to complete a certain level of productivity during the day
Web Access Control vs DNS Protection
| Web Access Control | DNS Protection |
|---|---|
| Separately licensed add-on | Included in base product offering |
| Allows you (the administrator) to block different categories of websites (e.g., pornography, violent cartoons, hackers, etc) based on what you want your end-users to be able to access | Works behind the scenes checking hostnames against malicious hosts |
VIPRE Recommends
We recommend enabling DNS Traffic Filtering or Malicious URL Blocking for HTTPS Traffic when using Web Access Control. Refer to Related Articles for details on Web/DNS features.
Refer to Related Articles for details on how to enable Web Access Control.
Congratulations! VIPRE Endpoint Detection & Response is now configured.