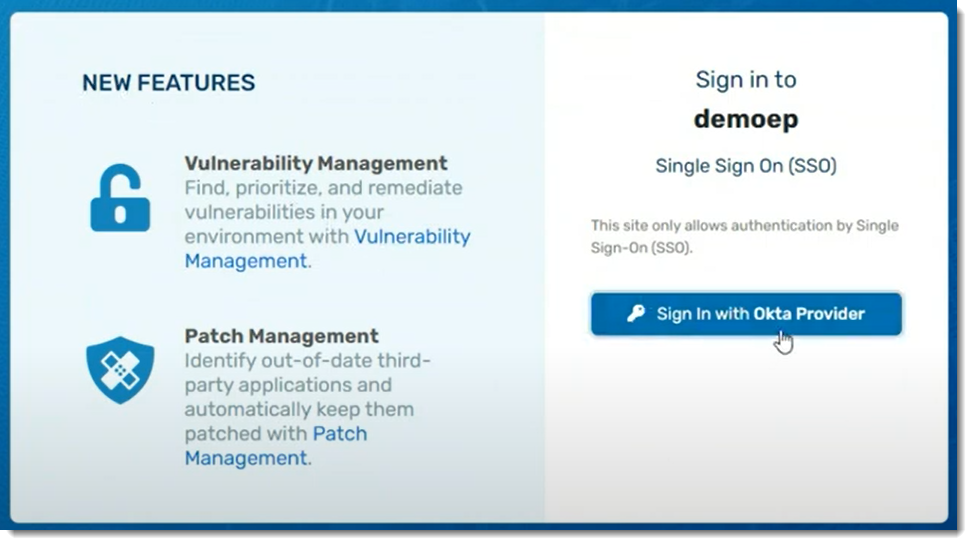
VIPRE Cloud supports using SAML, allowing for integration with SSO identity providers.
What is SAML?
SAML (Security Assertion Markup Language) is an open standard that allows for authentication and authorization between an identity provider (IDP) and a service provider (SP).
Configuration
SAML configuration occurs in the IDP admin portal and the VIPRE Cloud admin portal.
We've provided Okta-specific instructions for configuring SAML with VIPRE Cloud for single sign-on below. If your IDP is not Okta, you can still use the instructions below as a general guide. If you require further assistance, contact Technical Support.
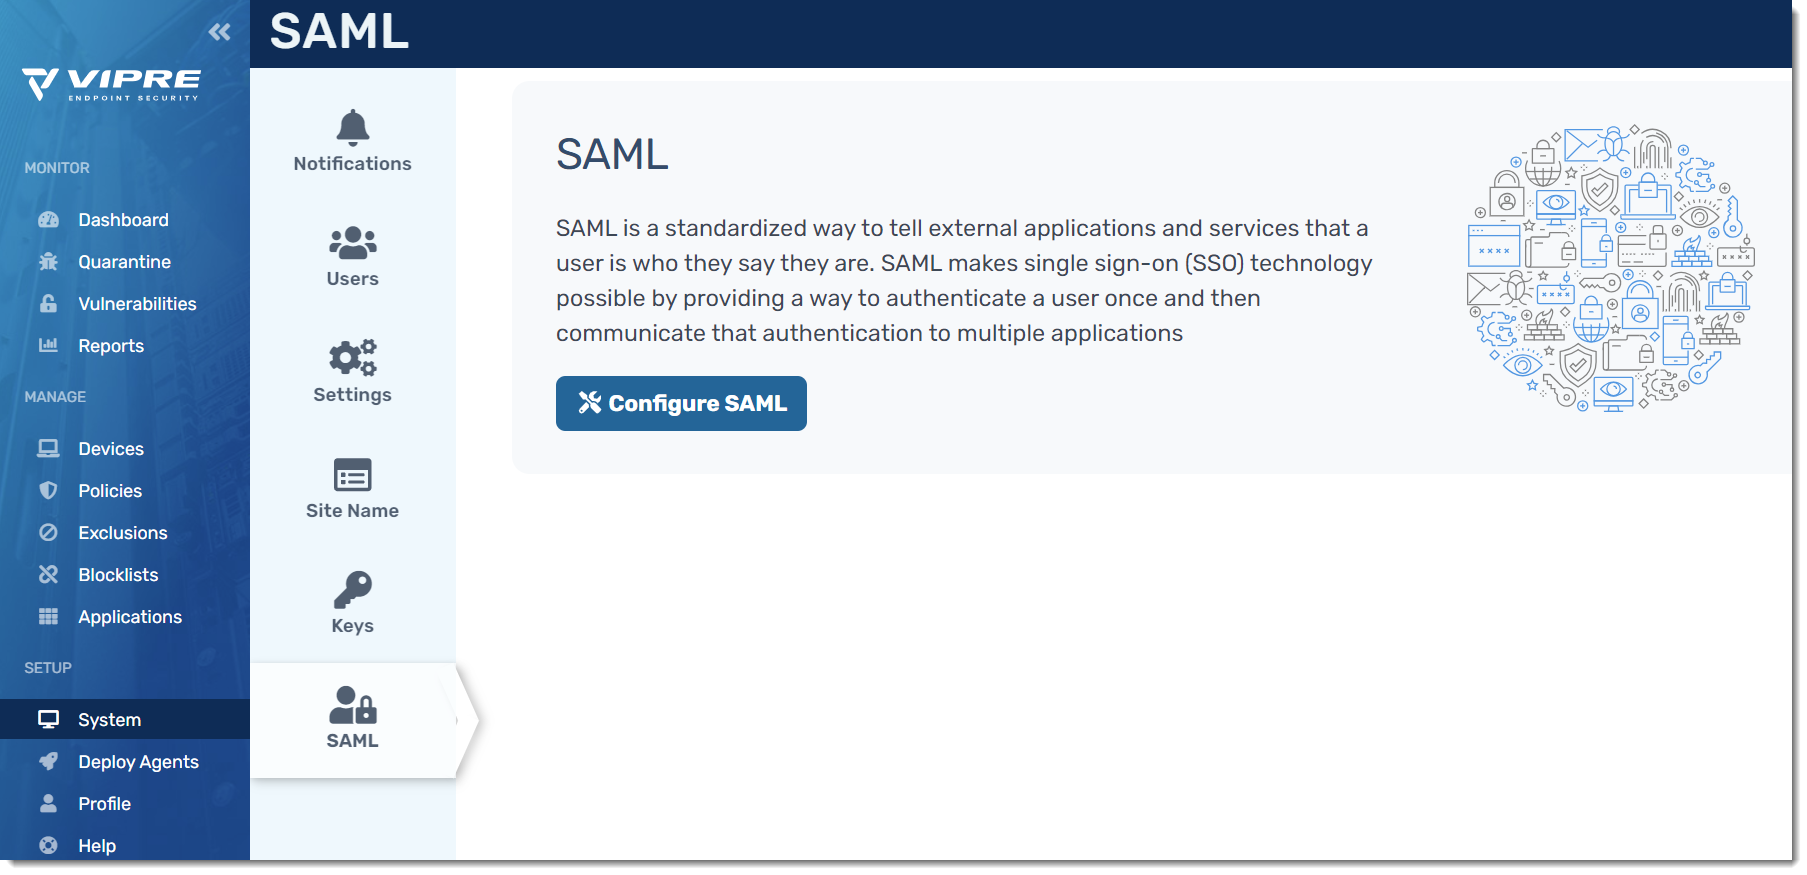
- Log in to your VIPRE Cloud portal
- On the left-side menu, find SETUP
- Click System, then select SAML
- Click Configure SAML
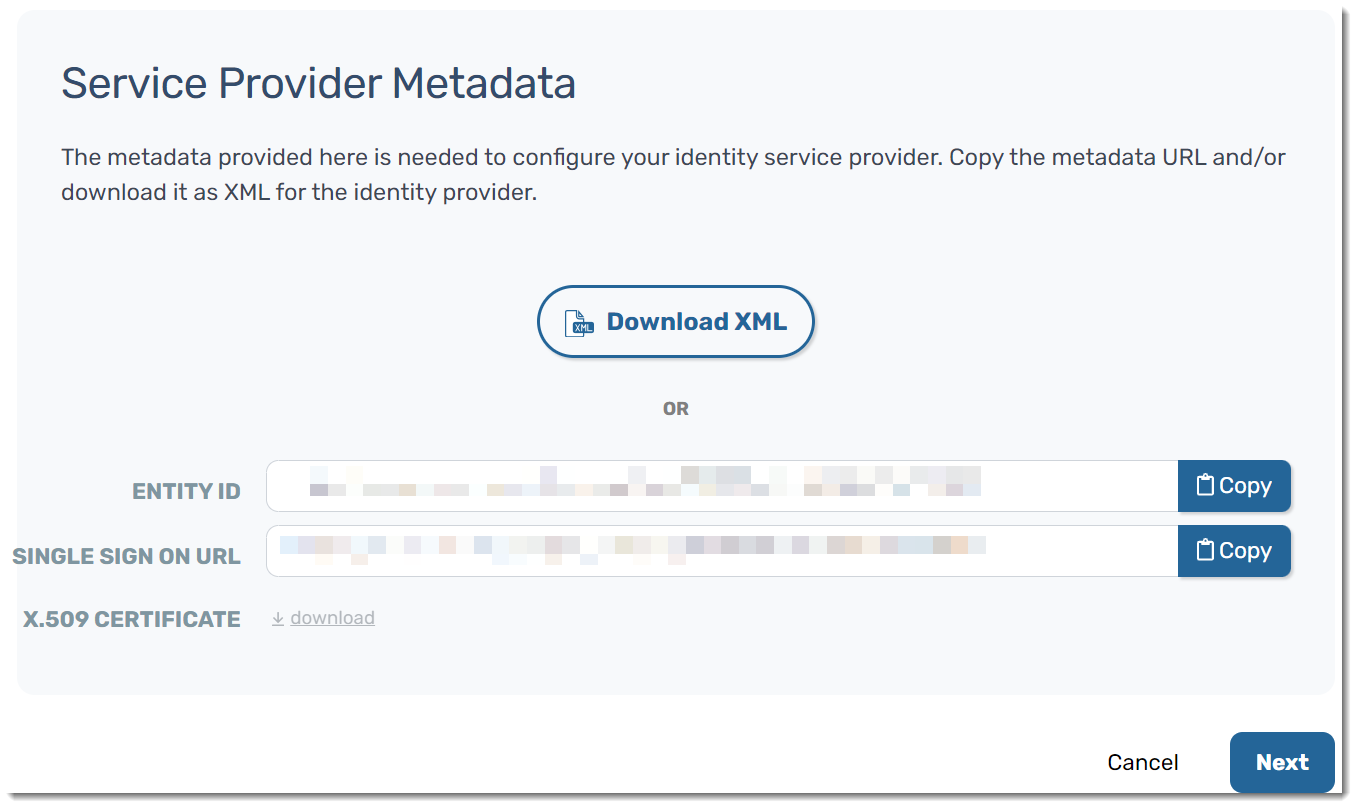
- You will presented with Service Provider Metadata, giving you options to download the XML or copy the metadata and manually add it to your IDP
- For this example, we are going to copy the metadata manually
- Open a separate browser tab and navigate to your Okta admin portal
- In your Okta portal, select Applications > Applications on the left-side menu
- In the main part of the screen, select Add Application

- Click Create a New App in the top-right
- Select SAML 2.0 as the Sign on Method and click Create
- On the General tab, under SAML Settings, click Edit
- App name can be any name you want to use to identify the VIPRE Cloud application within Okta
- All other options are based on your organization's desired decisions
- Click Next to get to the Configure SAML screen within Okta
- Go back to the browser tab that has your VIPRE Cloud portal open and copy the Entity ID from the Service Provider Metadata screen
- In the browser tab that you're using for Okta, paste the Entity ID into the Audience URI (SP Entity ID) field
- Go back to the browser tab that has your VIPRE Cloud portal open and copy the Single Sign On URL from the Service Provider Metadata
- In the browser tab that you're using for Okta, paste the Single Sign On URL into the Single sign on URL field
- Under Single sign on URL, Use this for Recipient URL and Destination URL should already be checked by default
- Ensure the following configurations are set in your Okta portal:
- Name ID format should be set to EmailAddress
- Application username should be set to Email
- Scroll to the bottom of the page and click Next
- Click Finish
VIPRE Cloud is now configured in Okta. The next step is to configure Okta in VIPRE Cloud.
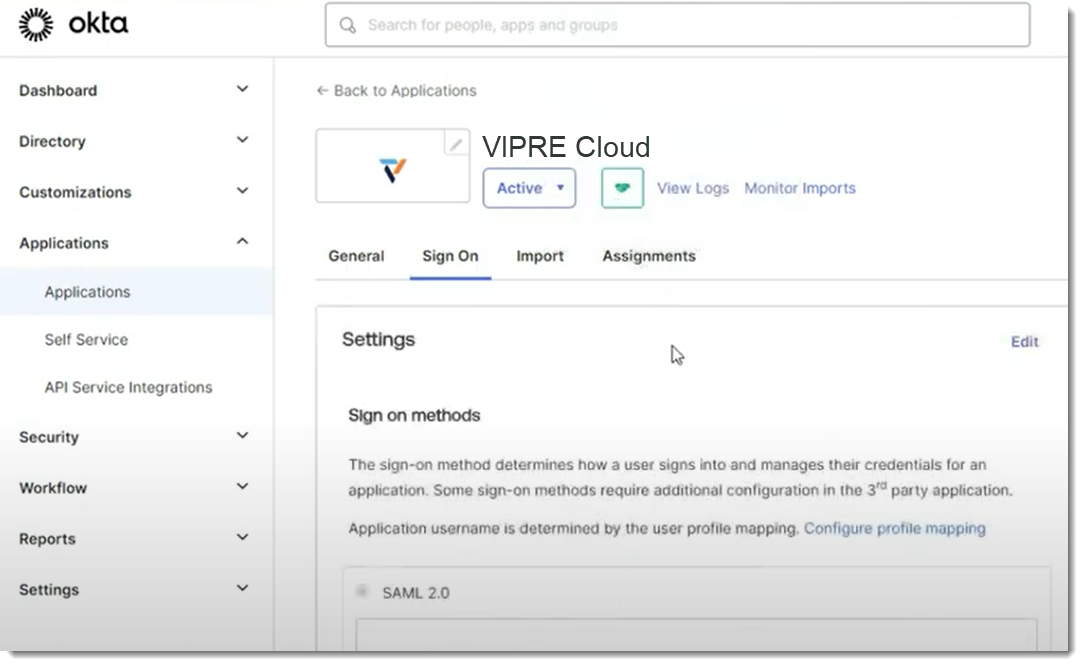
- You will see the Okta Application screen; click on the Sign On tab to find the Identity Provider Metadata
- In a separate browser tab, navigate to the MetadataURL from Okta and download the XML file
- Go back to the browser tab with VIPRE Cloud portal and click Next to get to the Identity Provider Metadata page
- Drag and drop the XML file in the box or click Select a file… to upload the XML file you downloaded in Step 22 above

- The Entity ID and Single Sign On URL will be filled in; next to Provider Name, enter how you want this to appear on the VIPRE Cloud sign-in page
- Click Next
- Here, we will test our SAML setup
- Step 1: Copy the login URL into a new browser tab
- You should see the login page for your IDP
- Step 2: Enter your credentials and log in to your IDP
- Step 3: Review the results of the test
- Step 1: Copy the login URL into a new browser tab
If you need to review the log or redo the test, you can complete those actions at the bottom of the page.
- Click Next
- The SAML Configuration Summary page allows you to see all of the settings in one place; when you are ready, click Save & Enable
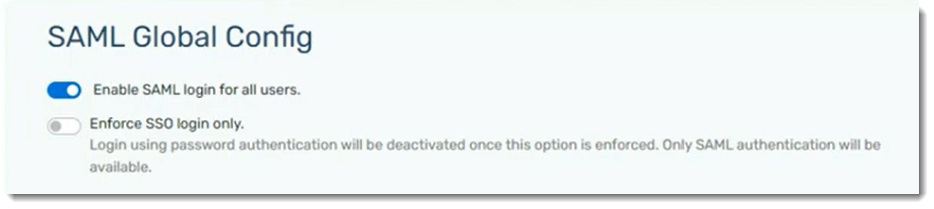
Once SAML is enabled for all users, you can choose to enforce SSO login only, deactivating password authentication.
Congratulations! SAML SSO is now configured for use with your VIPRE Cloud site.