
VIPRE Site Manager has the ability to create policies at the global level to make managing multiple clients easier. Local policies are still supported and can be used to override global policy, however, for most clients you should be able to define things once and then reuse those policies.
Create a Global Policy
There are several options for creating global policies.
Option 1: Add a new global policy
- Log in to VIPRE Site Manager
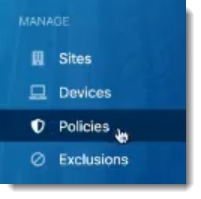
- Select Policies on the left side blue menu
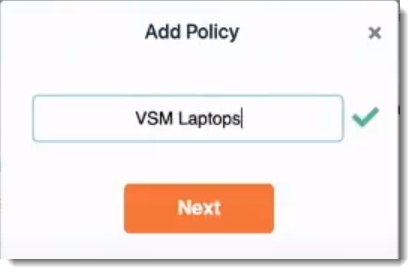
- Click on Add Policy in the top right corner

- Name your policy and click Next
- If the name is valid, a green checkmark will appear
- If the name is valid, a green checkmark will appear
Option 2: Clone an existing global policy
- Select Policies on the left side blue menu
- Find the policy you want to clone under Policy List
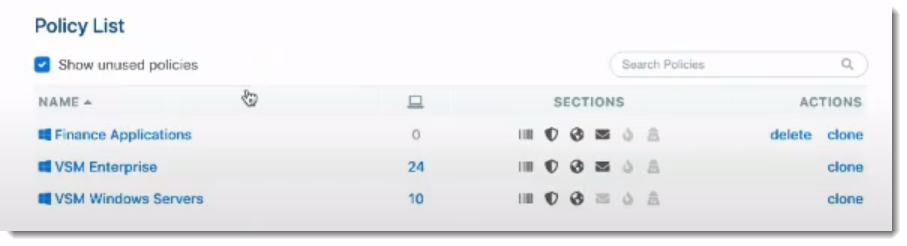
- Under Actions, select clone
Assign Devices to Policy
There are several ways to assign devices to policies:
- Specify the default policy that new devices of a given type will receive, and then deploy new agents to those devices
- Create a custom agent installer that is tied to a specific policy, and then deploy that installer to specific endpoints
- Choose an existing policy, and then select a set of devices to add to that policy
- Select a set of existing devices, and then move them to a new policy
Option 1: Select Default Policy Assignments
With default policy assignments, you can choose in advance which policy a new device of a given type will receive when its agent is installed. If these assignments are made at the Site Manager level, tenant sites will adopt these defaults. If changes are made local to a tenant site, however, those default assignments will override the Site Manager global assignments. You can however revert to the global assignments at any time.
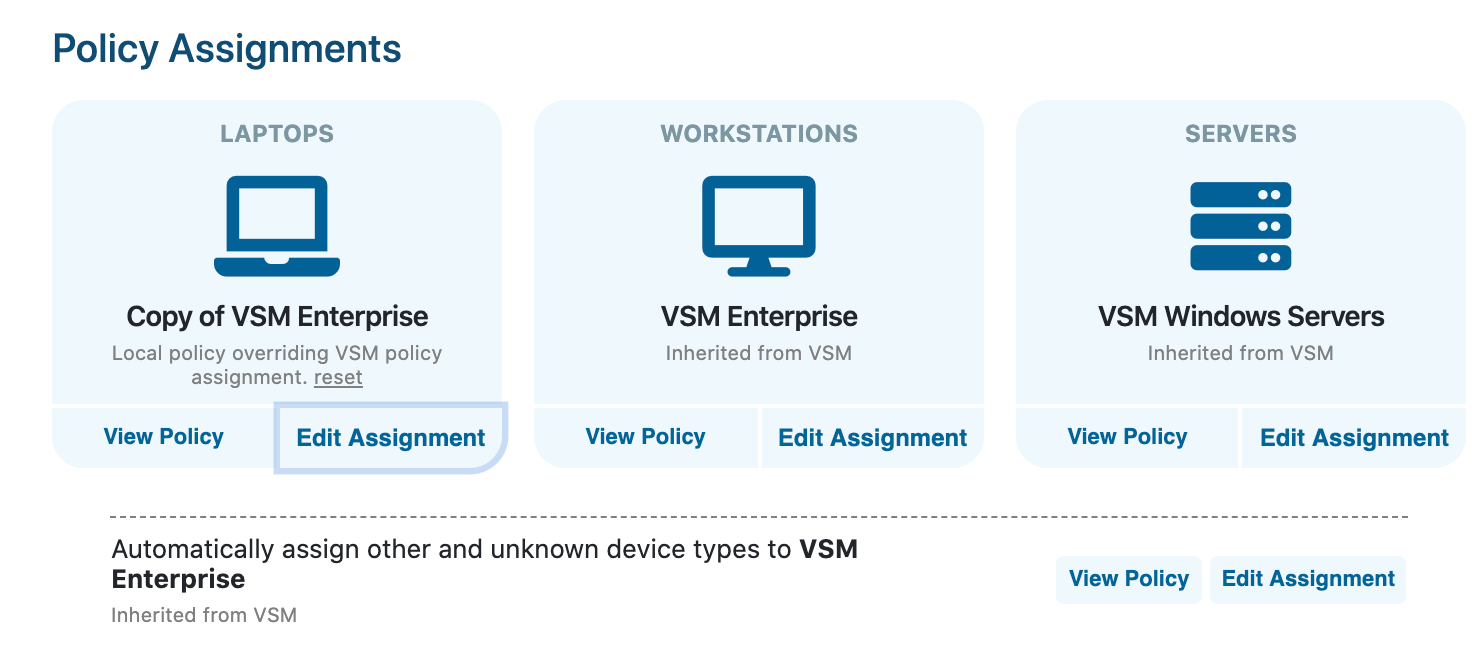
- Select Policies from the left-hand blue menu
- At the top of the Policies screen are listed three device types: Laptops, Workstations, and Servers - select the device type for which you wish to Edit Assignment of the default policy
- Assign a different policy for that device type
The net effect of the above procedure is that when a normal agent installer (i.e. not a Custom Policy installer) for the tenant site is deployed to an endpoint, the endpoint will adopt the policy specified as the default for that device type. Subsequently changing the assignment will not change policy for existing devices.
Tenant site assignments - note that the Laptops default policy overrides the global assignment
Option 2: Create a Policy-based Agent Installer
This procedure works only within an individual tenant site, and endpoints to which this installer is deployed will be associated with the specific site, and with the selected policy.
- Select Sites from the left hand blue menu
- Select the desired tenant site and click on its listing
- Select Go to Site within the listing to log in to the tenant site in a new tab
- Within the tenant site, select Deploy Agents from the left hand blue menu
- For the applicable OS agent, select the Create Policy Installer button
- Select the policy which should be bound to this installer (can be either a VSM global policy, or a local policy)
- Wait for the policy installer to generate
- Once the Download Installer button appears, you can download the installer and deploy it to new endpoints
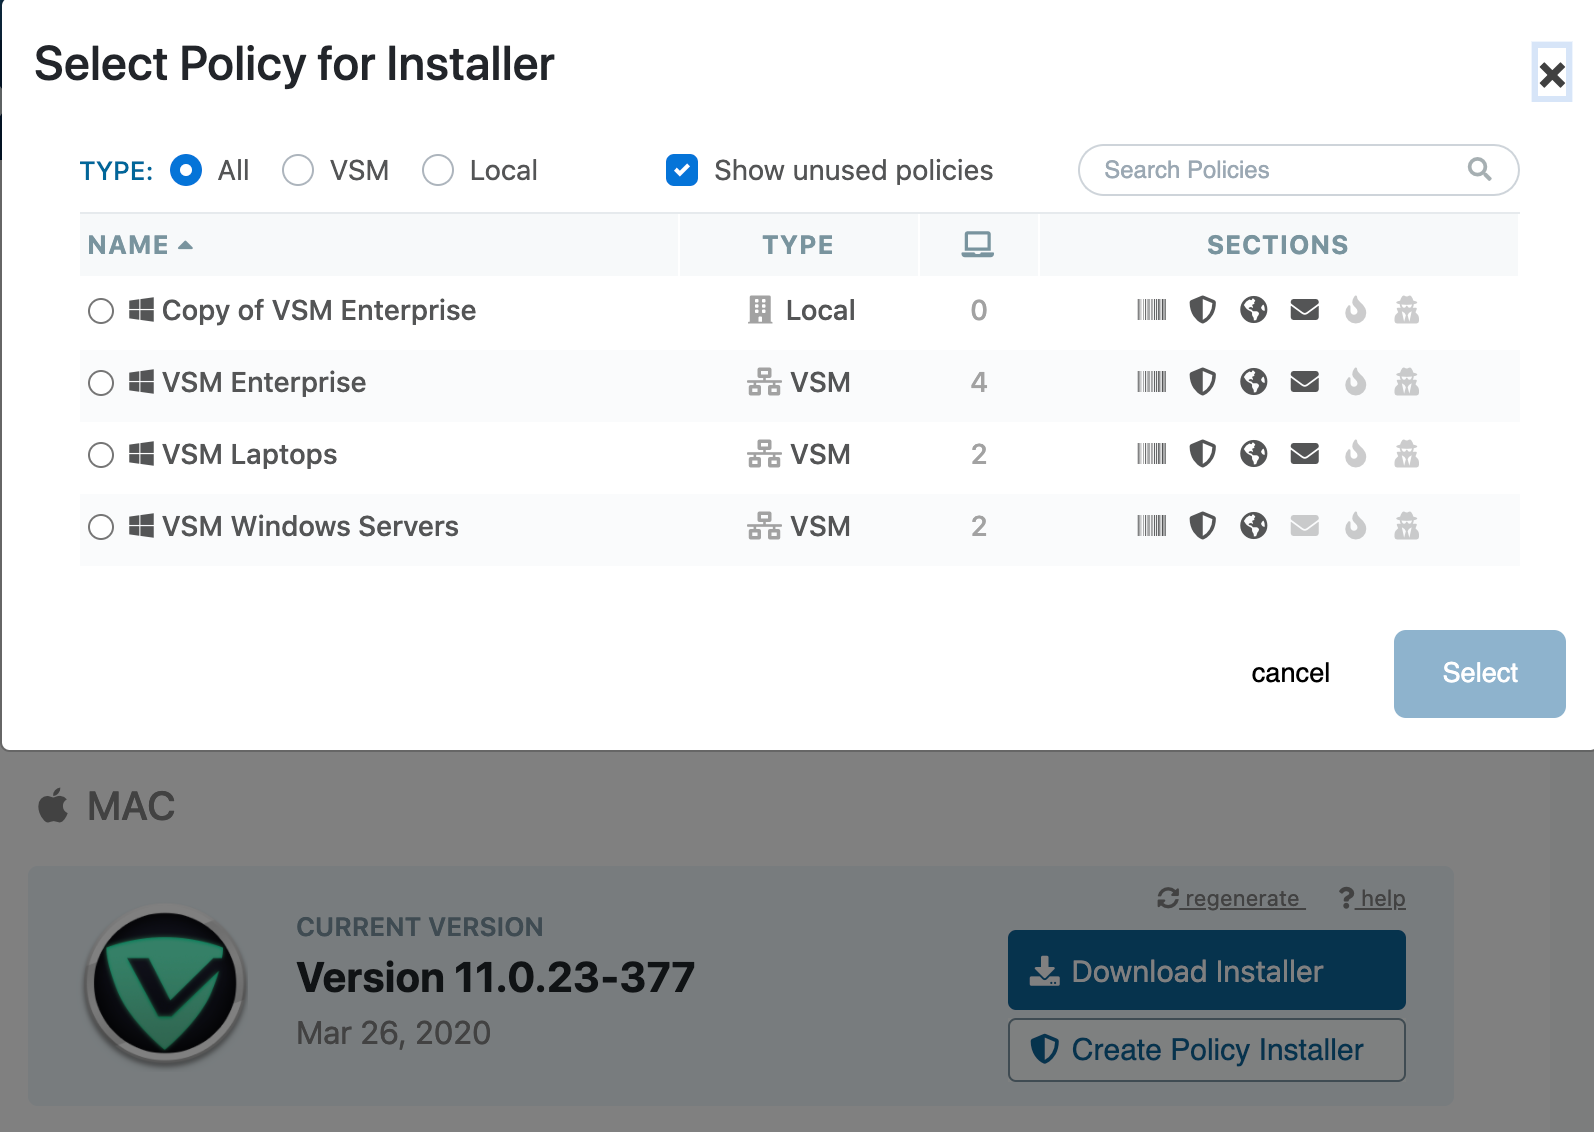
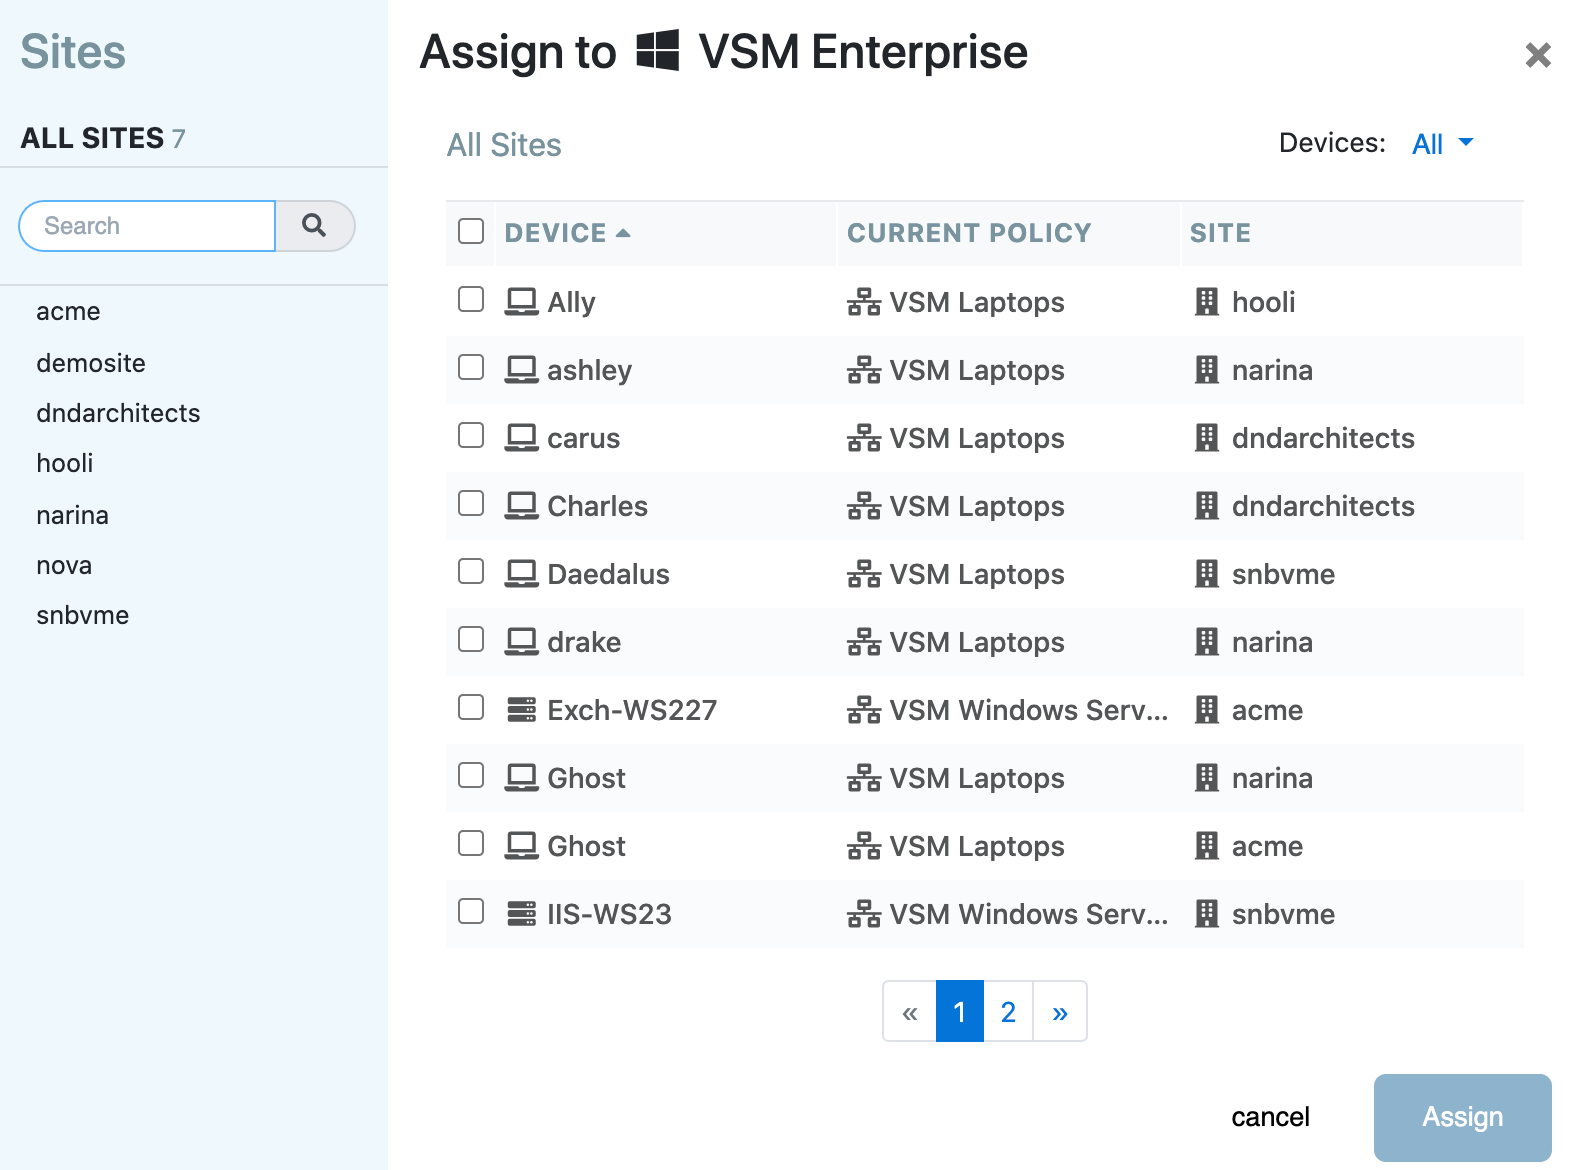
Option 3: Add Devices to a Given Policy
This feature works at both Site Manager level and within an individual tenant site.
- Select Policies on the left side blue menu
- Under Policy List, select the policy you want to assign devices to
- On the Policy Summary page, click Assign Devices (if none are yet assigned) or assign this policy (if some devices have already been assigned)
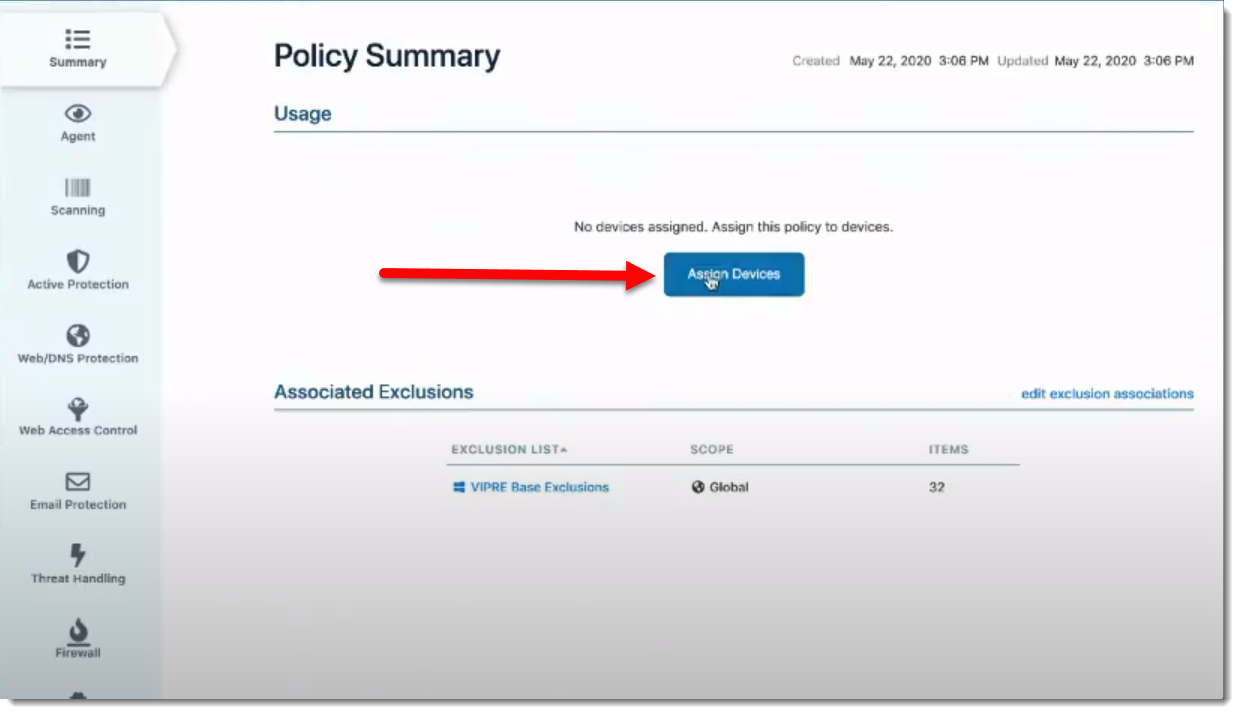
- A window will pop up to Assign Devices to Policy; place a checkmark next to the desired devices and click Assign
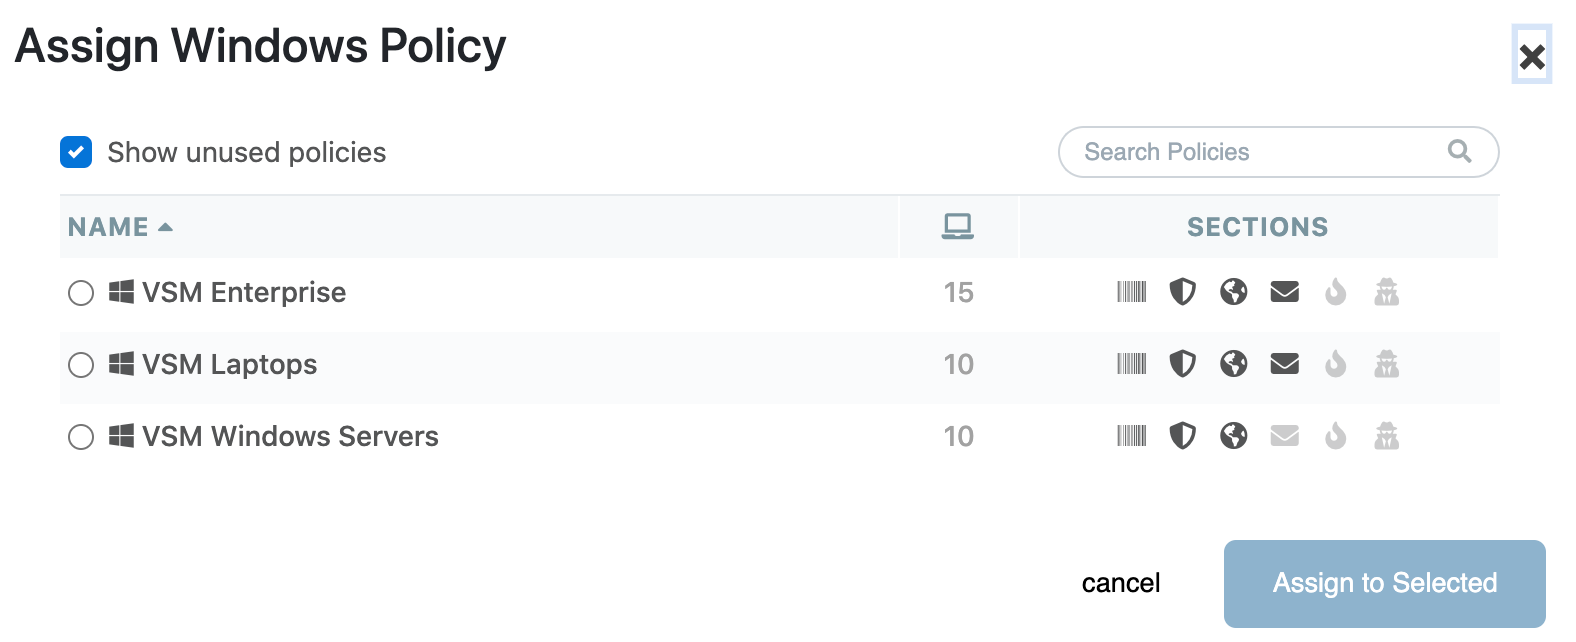
Option 4: Move Devices Into a Policy
This process works at both the VIPRE Site Manager level and within an individual tenant site.
- Select Devices in the left side blue menu
- Review the list of devices and select those you wish to move into a new policy
- Note: if you do not see the Policy column which lists the current policy to which the device is assigned, select the gear icon at the top right to enable that column
- Select the Actions menu at top right, then select Assign Windows Policy or Assign Mac Policy as appropriate
- Choose a policy from the list to which the selected devices will be assigned, then select Assign to Selected
- Note: When performing this action from Site Manager, only global policies will be visible. Within a tenant site, both global and local policies will be visible.
Exclusions for Global Policies
Exclusions now have multiple scopes:
- Global: Global exclusions will automatically apply to all devices across all sites. You will not need to descend into tenant sites or modify tenant policy assignments to get these exclusions to apply.
- Policies: Policy exclusions can be associated with one or more Site Manager-level global policies, which can in turn be assigned to devices resident in tenant sites. Changes made to Policy exclusions will apply to all local tenant devices which are assigned to associated global policies. If you select this option, you should select which global policies will reference this exclusion set.
- Site: Site exclusions apply to all devices within a specific set of tenant sites. If you select this option, you should choose a set of sites to which this exclusion set will apply.
- Site-Specific Local Policies: These exclusions apply to local policies defined at the tenant site level. If you select this option, you should choose a set of sites and local policies for which the exclusions will apply.
Note that you may also edit exclusions associated with a given policy from the Policy section, but at the tenant site level you may not edit global policies to modify exclusions.
- On the blue left-side menu, select Exclusions
- On the top right, click Add Exclusion List
- Name your exclusion list and click Next
- Set File, Domain, and Process exclusions as usual
- Click on Scope on the light blue left-side menu
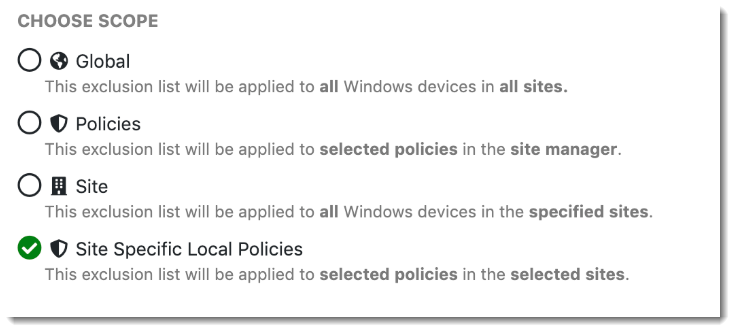 Select the appropriate scope for how you wish to use this exclusion set
 - If you have chosen one of the Scopes that requires explicit selection of sites and/or policies, make those selections
Important
When Endpoint Detection & Response (EDR) is enabled for a child site, you are essentially turning on an entitlement to use the new EDR features + Patch Management + Web Access Control.
When that child site adopts the Site Manager (VSM) level controlling policy for its agents, the features that are enabled by entitlement will function. A different site, without EDR or Patch Management enabled (for example), can still use the global policy, but the unentitled features will not work.